Using a Cybiko as a Serial Terminal
Watching LGR’s video on the Cybiko reminded me that I had a few Cybikos around and wanted to see if I could do something useful with one. If you haven’t heard of the Cybiko before (and I don’t blame you), these weird little pocket computers came out 20 years ago and had the killer feature of allowing users to chat with one another wirelessly, without any existing infrastructure. As a mesh-networking enthusiast, I was originally drawn to the Cybiko for its networking abilities, though this would be more of a novelty these days (I still hope to do my own distance testing at some point) as I’m sure I wouldn’t want to build anything running over Cybiko links. Testing aside, I found out that you can actually use a Cybiko as a portable terminal! How awesome is that? I still subscribe to the idea that every piece of hardware should have a serial port and speak RS-232 (however impractical that is). We should have roaming bands of tinkerers armed with contraband pocket terminals performing guerrilla maintenance or creating mild mayhem by spreading virtual graffiti to digital billboards. Feel free to use this idea in your next cyberpunk short story.
Anyway, let’s figure out how to get the terminal working.
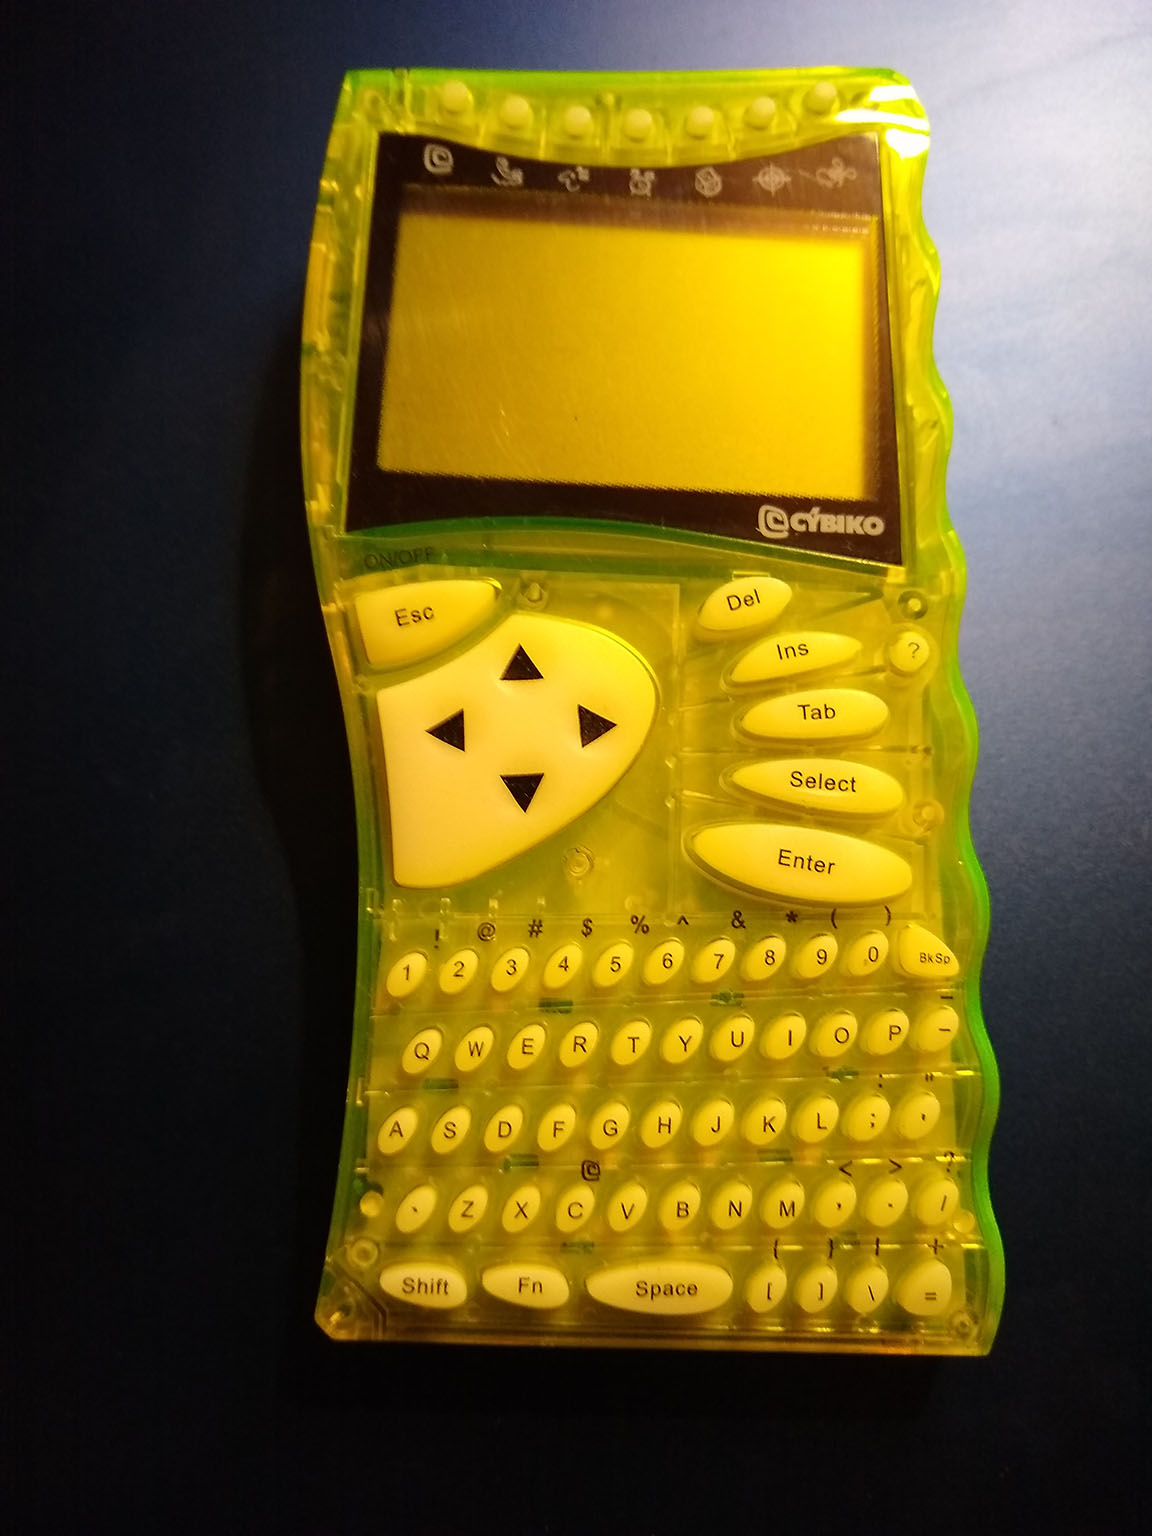
A resting Cybiko.
The Not-So-Portable Terminal
The Cybiko is a portable device, however my batteries are long dead. For the life of me I cannot find a replacement battery that is close to the same size as the included gumstick. If you know of a good drop-in replacement, please let me know (I’ve already bought two types that are the wrong size). That said, if you have a Cybiko somewhere in your stewardship, GET THE BATTERIES OUT OF IT. The batteries in all of these are corroding bad and causing damage to the motherboard. Remove them and clean things up before there is irreversible damage.
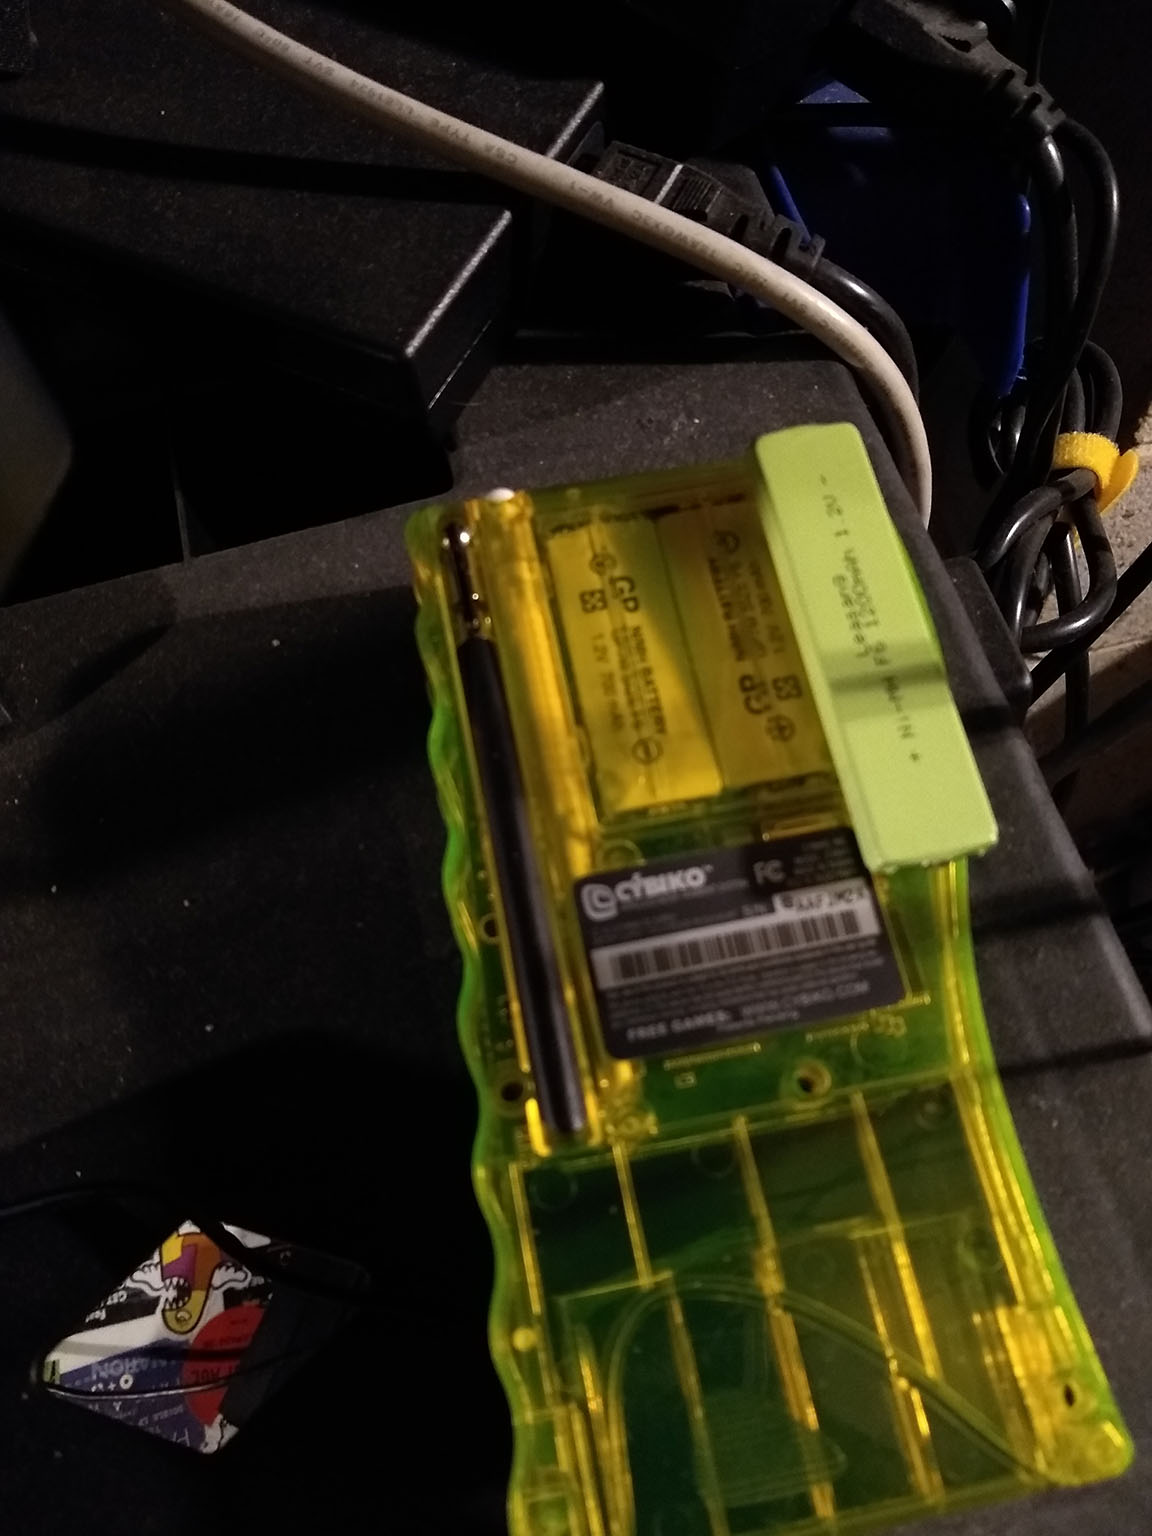
Too many wrong batteries.
Because I don’t have working batteries, I will have to use my Cybiko with the AC adapter plugged in. This isn’t ideal but it is what it is until I have working batteries.
Equipment List
We’ll need a few things for this exercise:
- An original Cybiko (not an Xtreme model)
- A Cybiko PC cable (it has a DE-9 connector on one end, 4-pin Cybiko connector on the other)
- A PC running Windows (We need this to load software onto the Cybiko, Windows 10 works fine)
- A USB to serial adapter (If your PC doesn’t have an RS-232 port)
- A target machine to control (Something with a DE-9 connector that wants to give us a console)
The equipment list should be fairly obvious here. The first thing you need is an original Cybiko as the Xtreme does not speak RS-232. I don’t think the specific version of the original model matters, but I have had problems where the terminal application will simply not load on certain units. This could be related to the operating system version but I don’t know for sure. If anyone knows how to flash different versions of CyOS let me know and I’ll do some testing!
You will also need a PC cable to connect your Cybiko to a computer to load software, and then again to connect it to your target machine. These cables come up from time to time on eBay but it looks like you can also build your own by wiring the port up to a DE-9 connector directly. The pinout is fairly well documented online. The PC you are using to load the software must be running Windows (if you know a way to transfer files to a Cybiko using Linux, let me know!). We will be leveraging the Cybiko SDK to transfer files and though this software was released about 20 years ago it works perfectly fine on a Windows 10 machine with no compatibility configuration required. If your PC does not have an RS-232 port built in, you will also need a simple USB to serial adapter cable to use in conjunction with the PC cable.
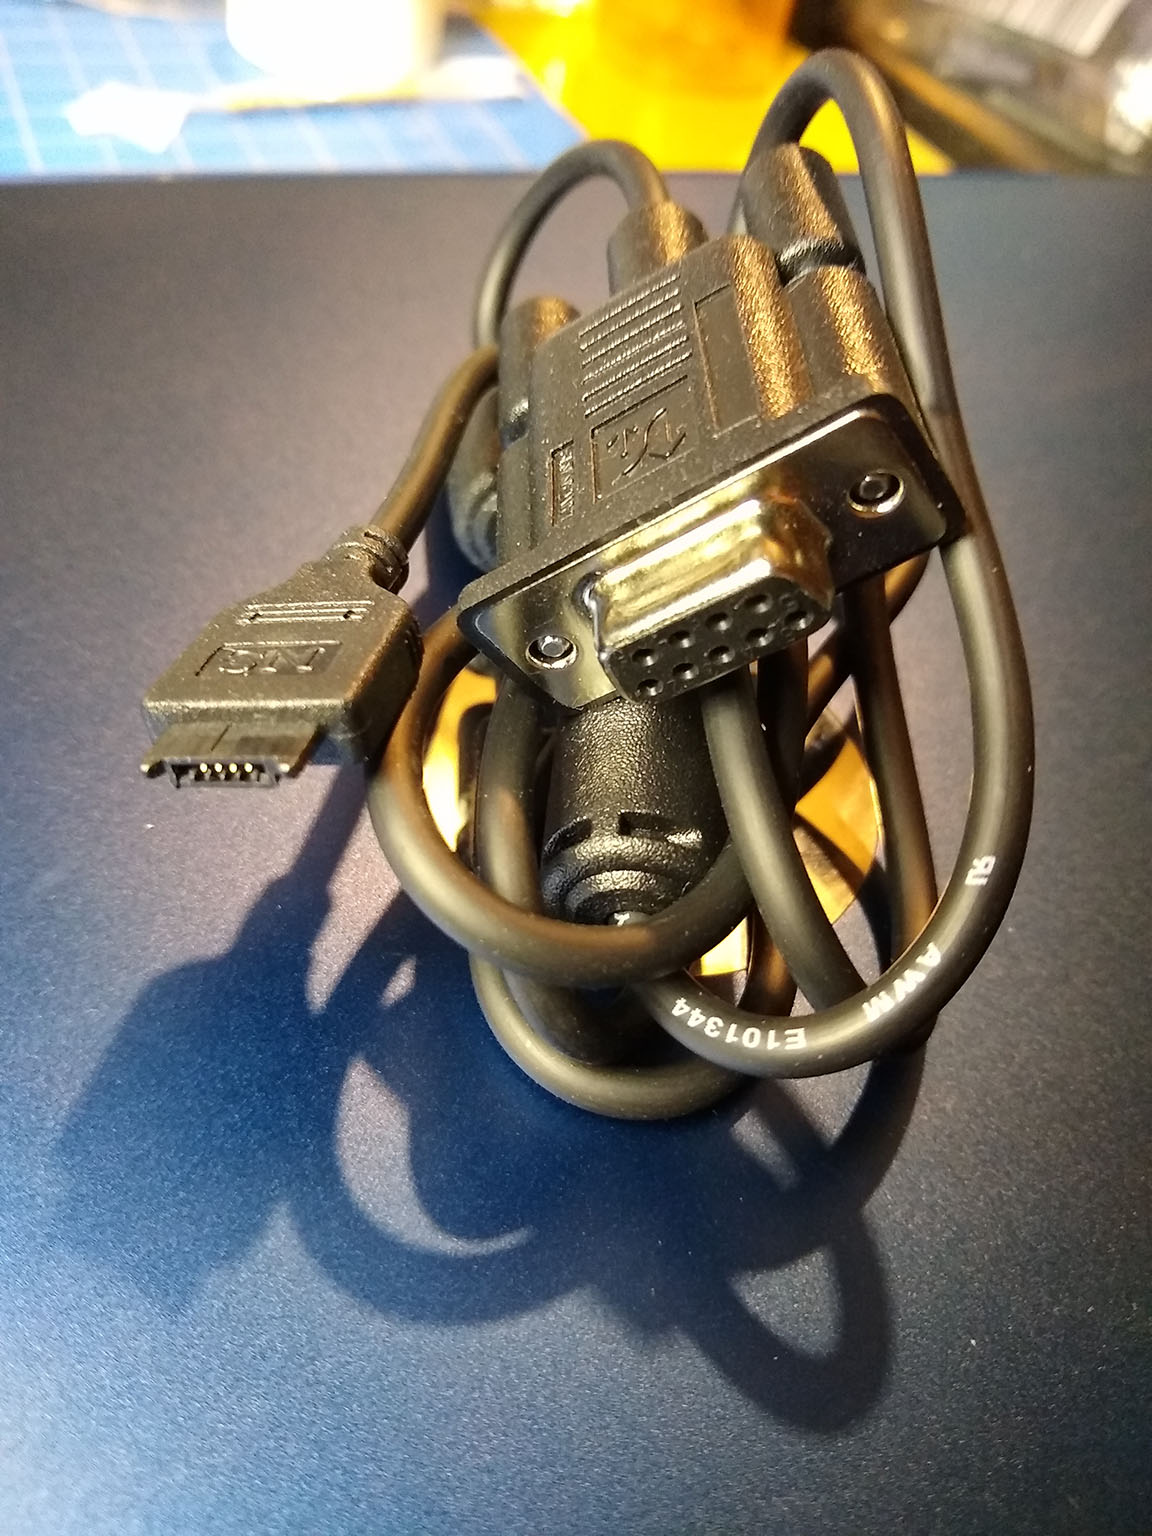
The PC cable.
Lastly, and obviously, you will need some sort of device to connect to. This could be some weird piece of equipment, but most people are probably going to connect to a computer of some sort. I will be connecting to a Raspberry Pi configured to allow connections via RS-232. You can read about how that setup was done here.
Getting the Software
As I mentioned earlier you will need the Cybiko SDK(Mirror) as well as the RFTerm app(Mirror) and the comport.dl driver(Mirror). The Cybiko SDK can be installed normally on your Windows computer while RFTerm.app and ComPort.dl need to be extracted from their respective zip archives.
Hooking the Cybiko up to the computer is incredibly easy whether you are using the USB to serial adapter or not. If you are using the USB to serial adapter, inserting it into your computer (with or without the Cybiko attached) should have it show up as a COM device the same way you might see a physical serial port. Mine identifies as COM3 in Device Manager.
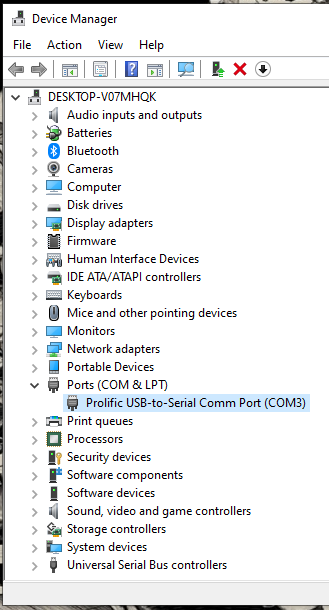
The adapter in Device Manager.
The Cybiko SDK installs an application called Cybiko Console that you should now load up. On the menu bar, you can click on Port to select your device (COM3 in my case).
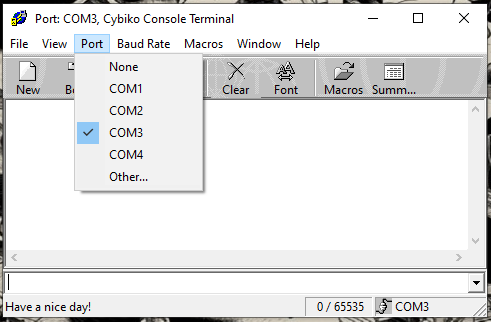
Choosing the port.
With the Cybiko connected at this stage, it can then be powered up and the console will display boot-time messages! Now, press the Send button in Cybiko Console and select both RFTerm.app and ComPort.dl to be sent to the device. You should get two success messages in the console when the transfers are finished. If a transfer fails, check the storage of your Cybiko as you may have to delete applications or other data to free up space.
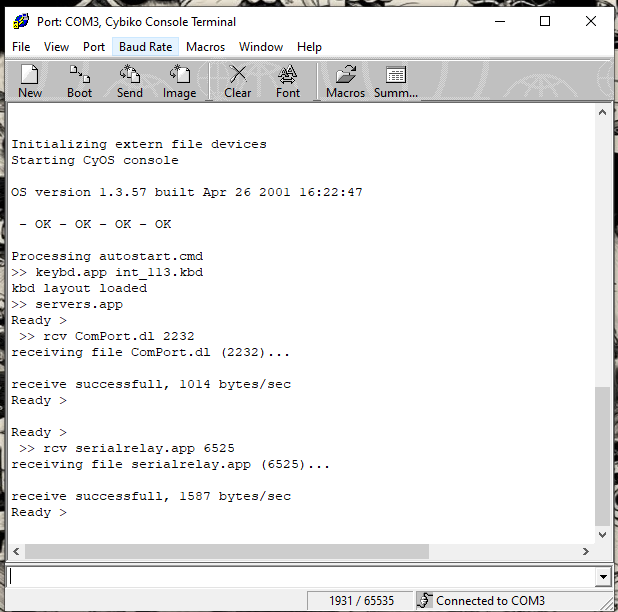
Files transferred successfully.
Using the Terminal
The RFTerm application is meant to act as a terminal when either directly wired to a device or wirelessly connected to a second Cybiko running the Serial Relay application. For this write-up, we will have a wired connection to the device we want to access, but if you have a second Cybiko you may want to set it up as a relay so you can access your device wirelessly.
At this point, make sure that your Cybiko is attached to the target machine via the PC cable. Your target machine should be on, and you can go ahead and power on the Cybiko. Navigate to the Applications menu on the Cybiko and select RFTerm. Note: The Cybiko is something of a smeary, blurry mess so hopefully the below images are somewhat readable.
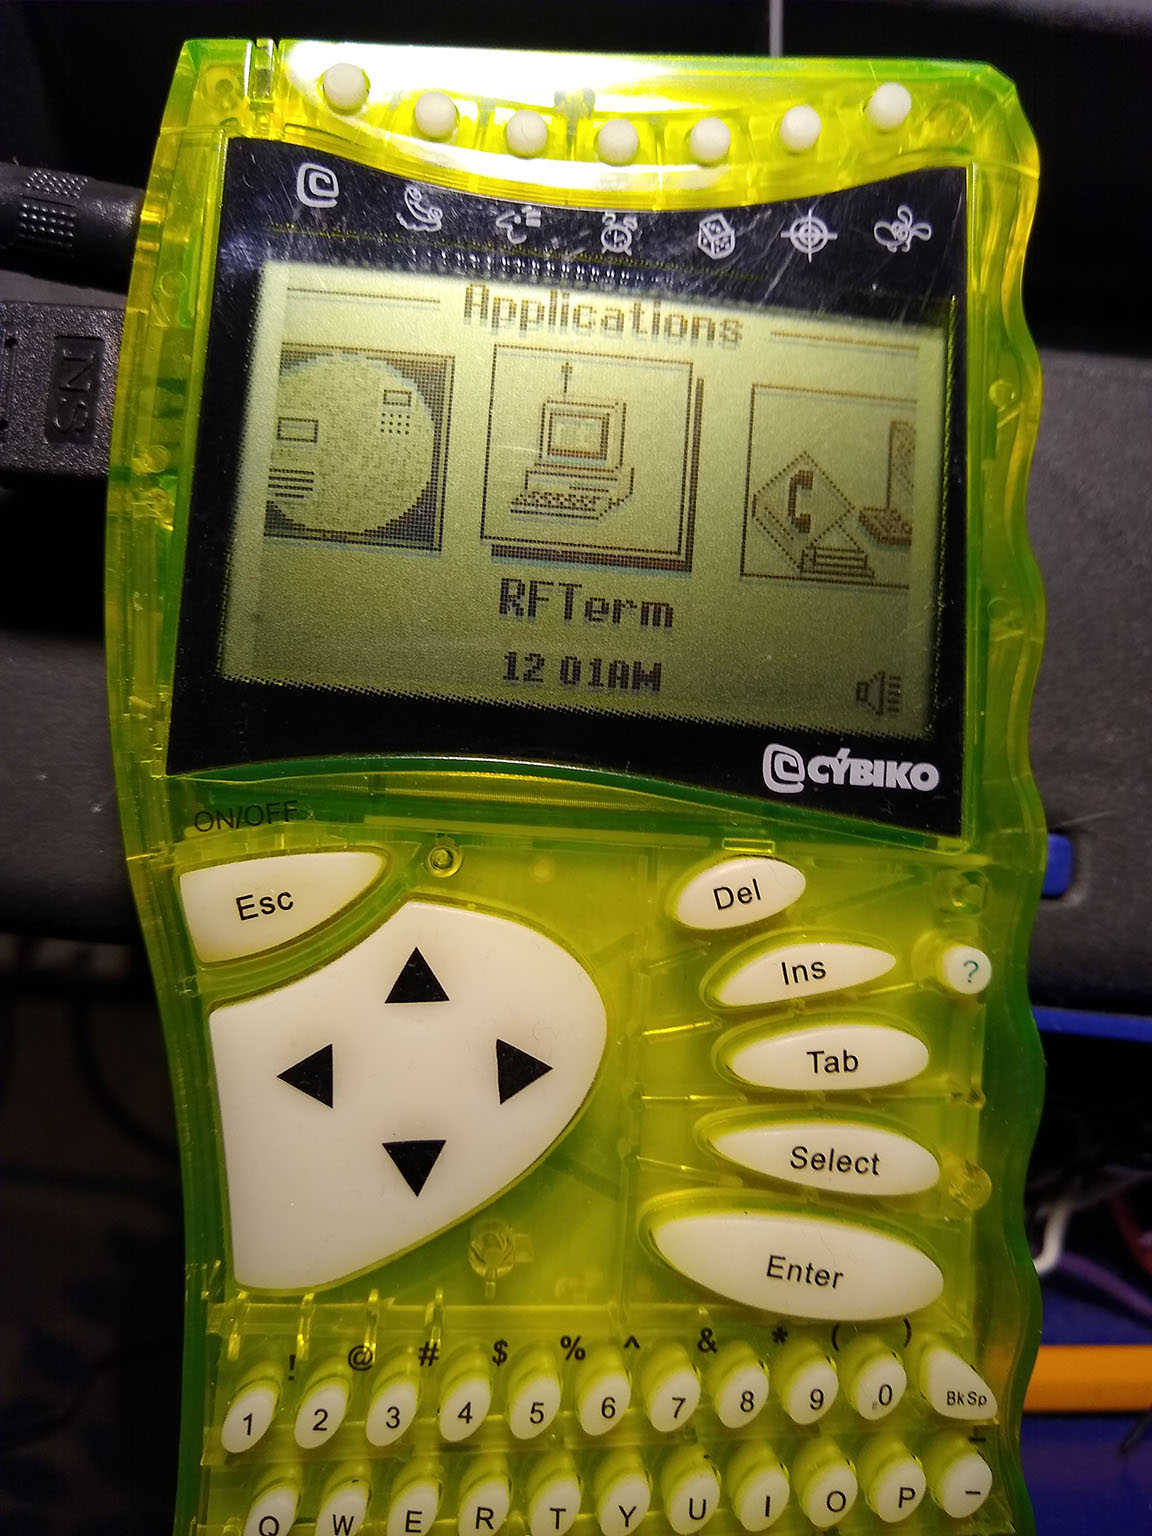
RFTerm under Applications.
After RFTerm has loaded, press Fn-Enter to check options. Make sure that Tx/Rx Type is set to RS232:
RFTerm’s settings menu.
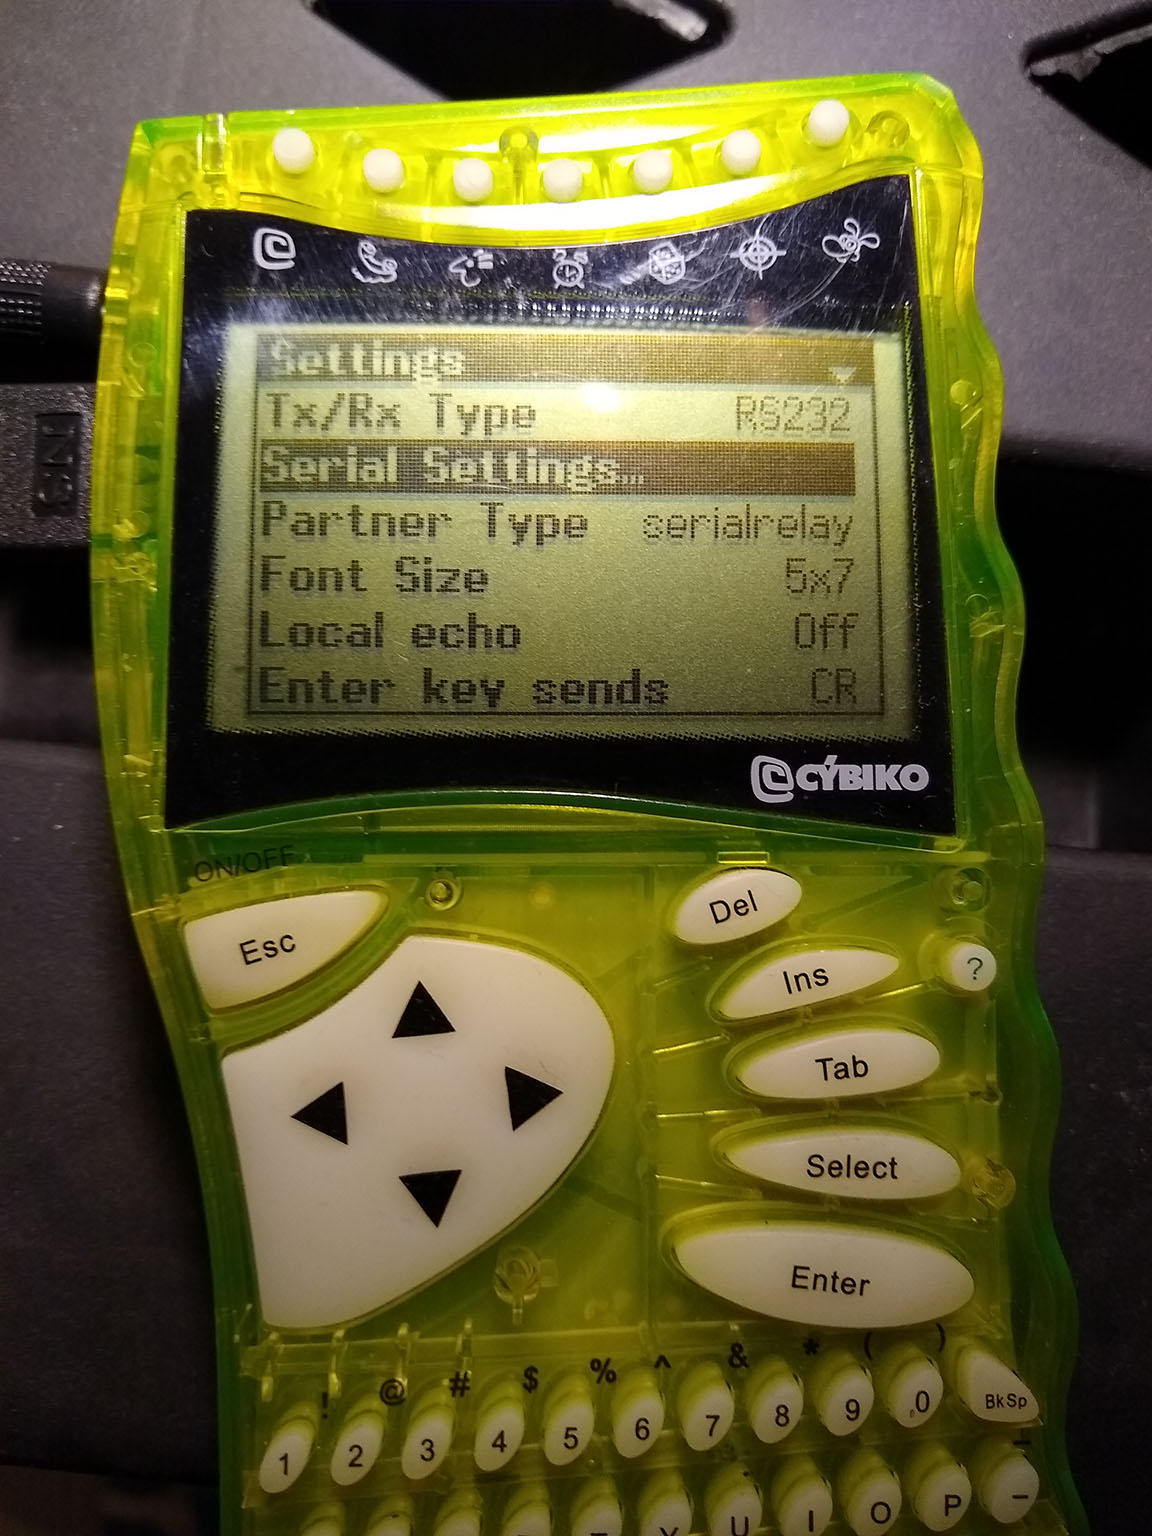
Now move down to Serial Settings and make sure that these settings match what the device you are connecting to expects. As you can see, I am connecting at 9600 baud with eight data bits, one stop bit, and no parity or handshake:
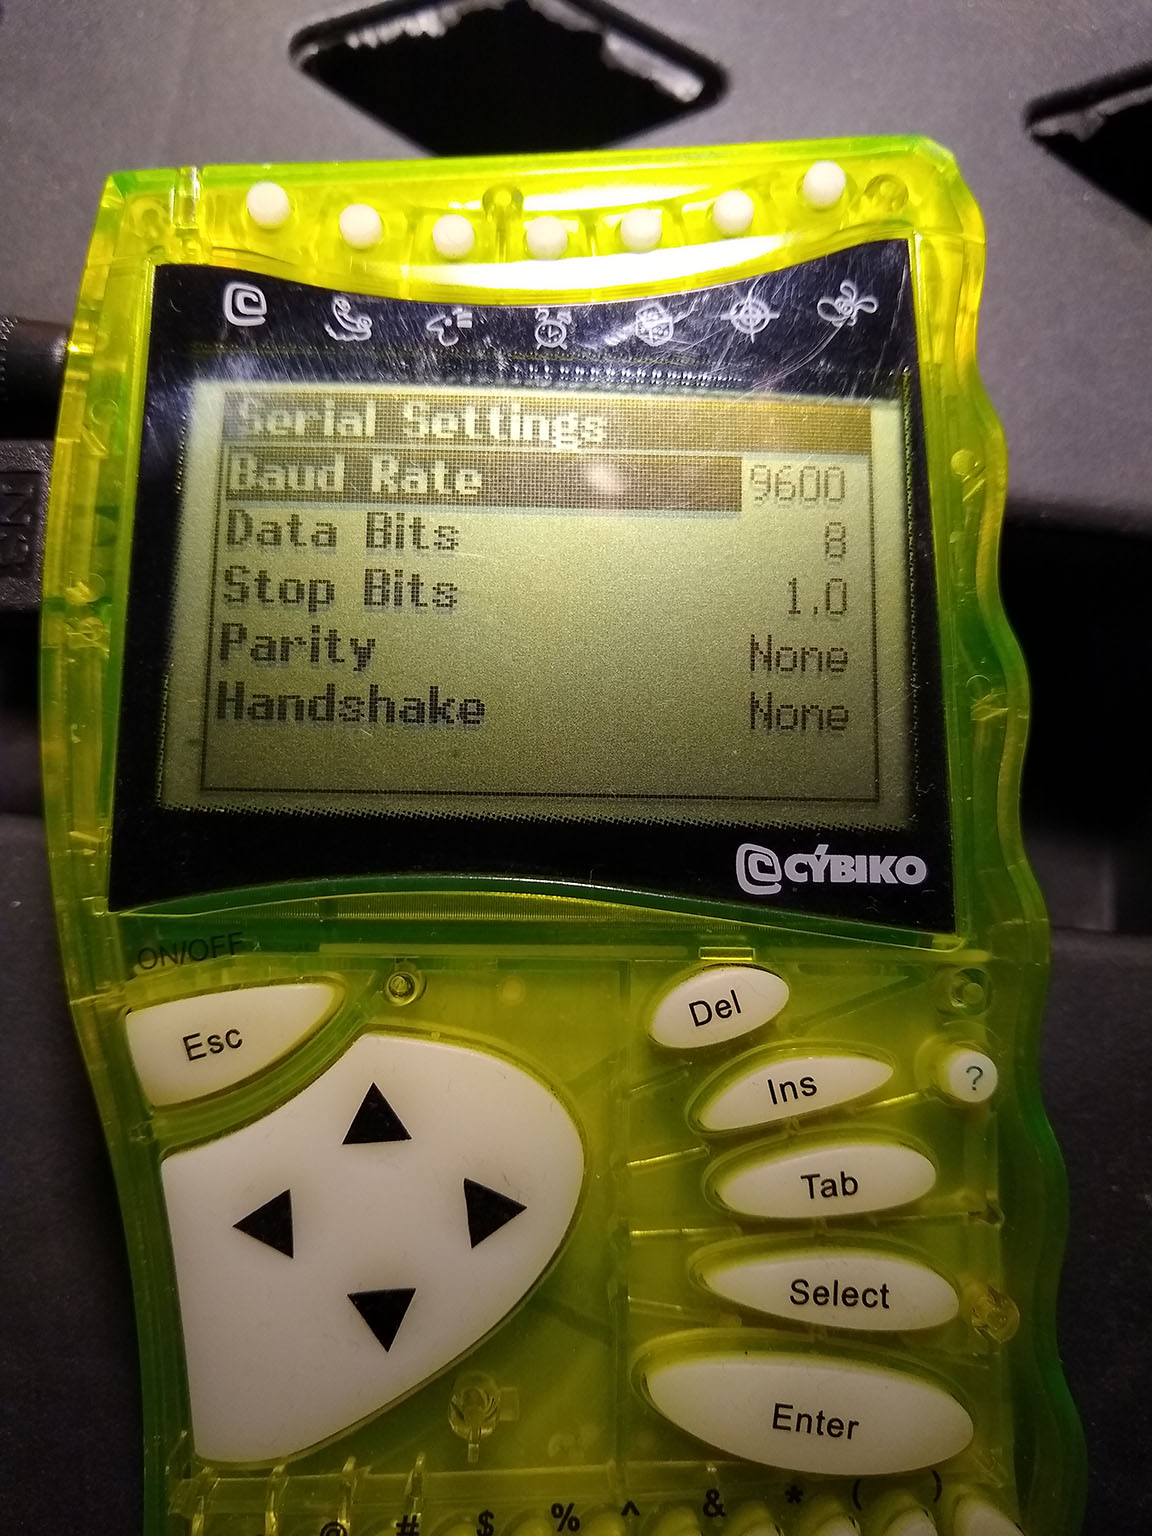
Examining the serial settings.
After verifying, press ESC to get back to the main (blank) screen and press Enter a few times to get some output from your device. If all went well, you should see some text on the console and be able to interact!
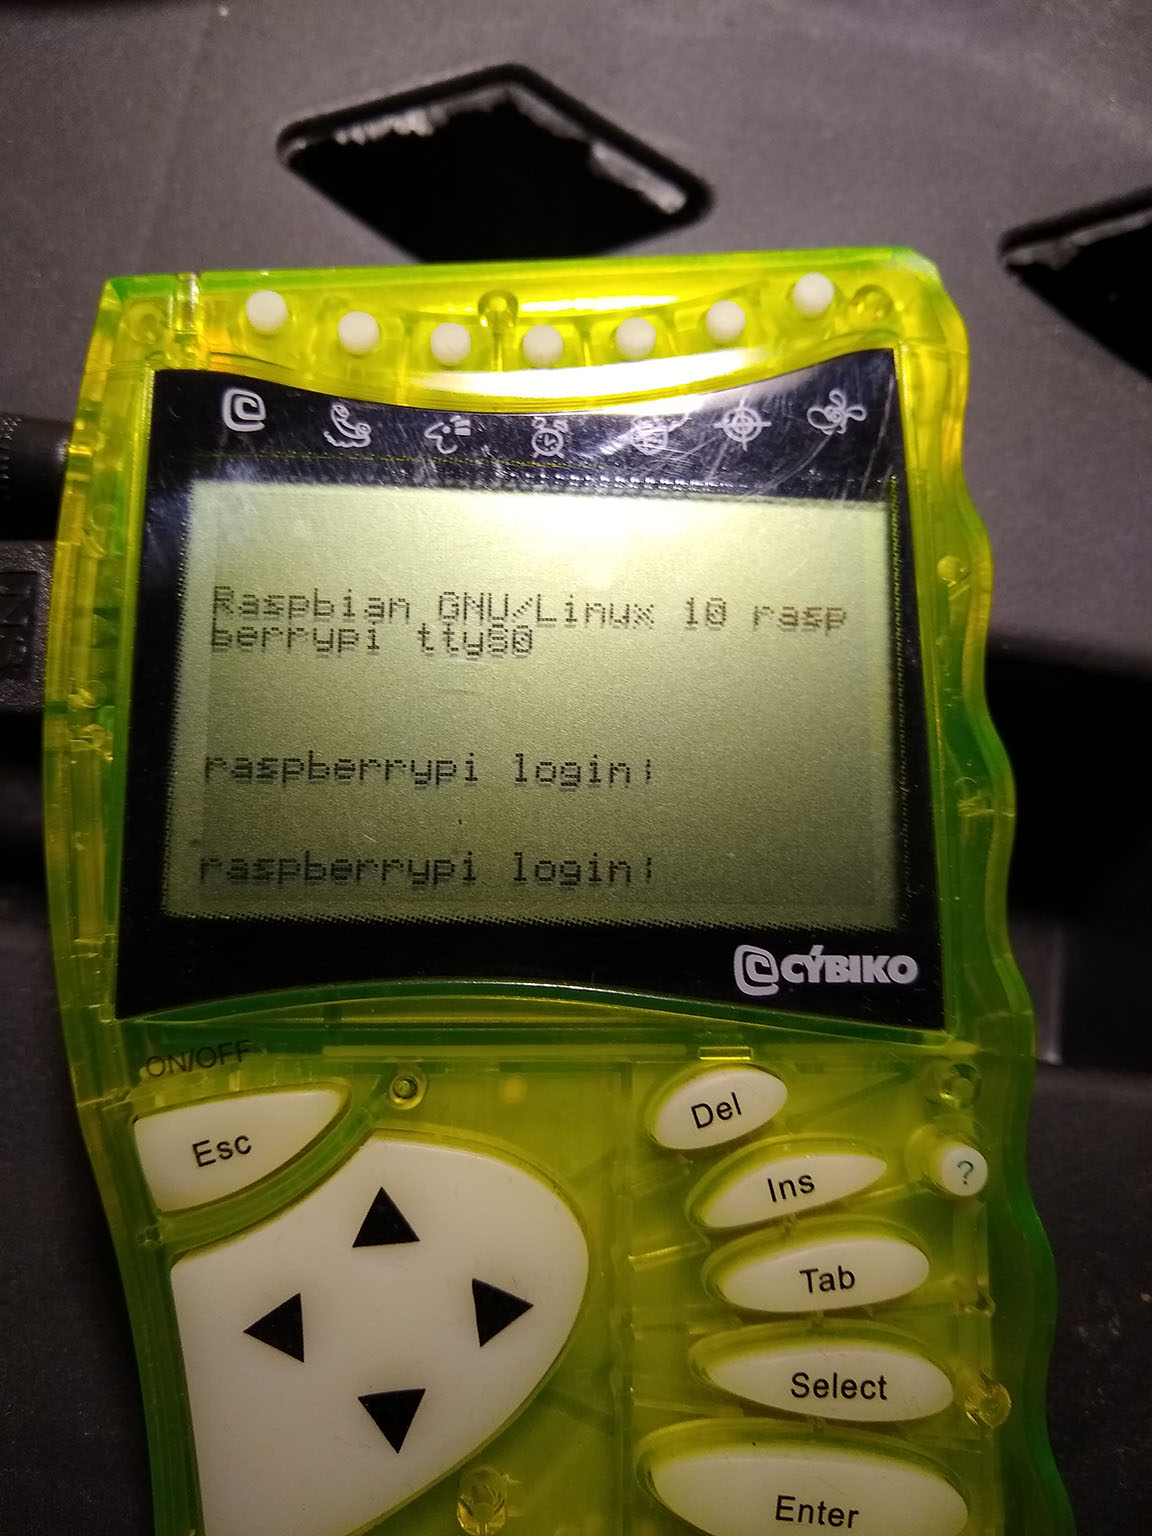
A Raspberry Pi login prompt!
From here you should be able to communicate with the machine as though you were sitting at it. You can log in and send it some commands:
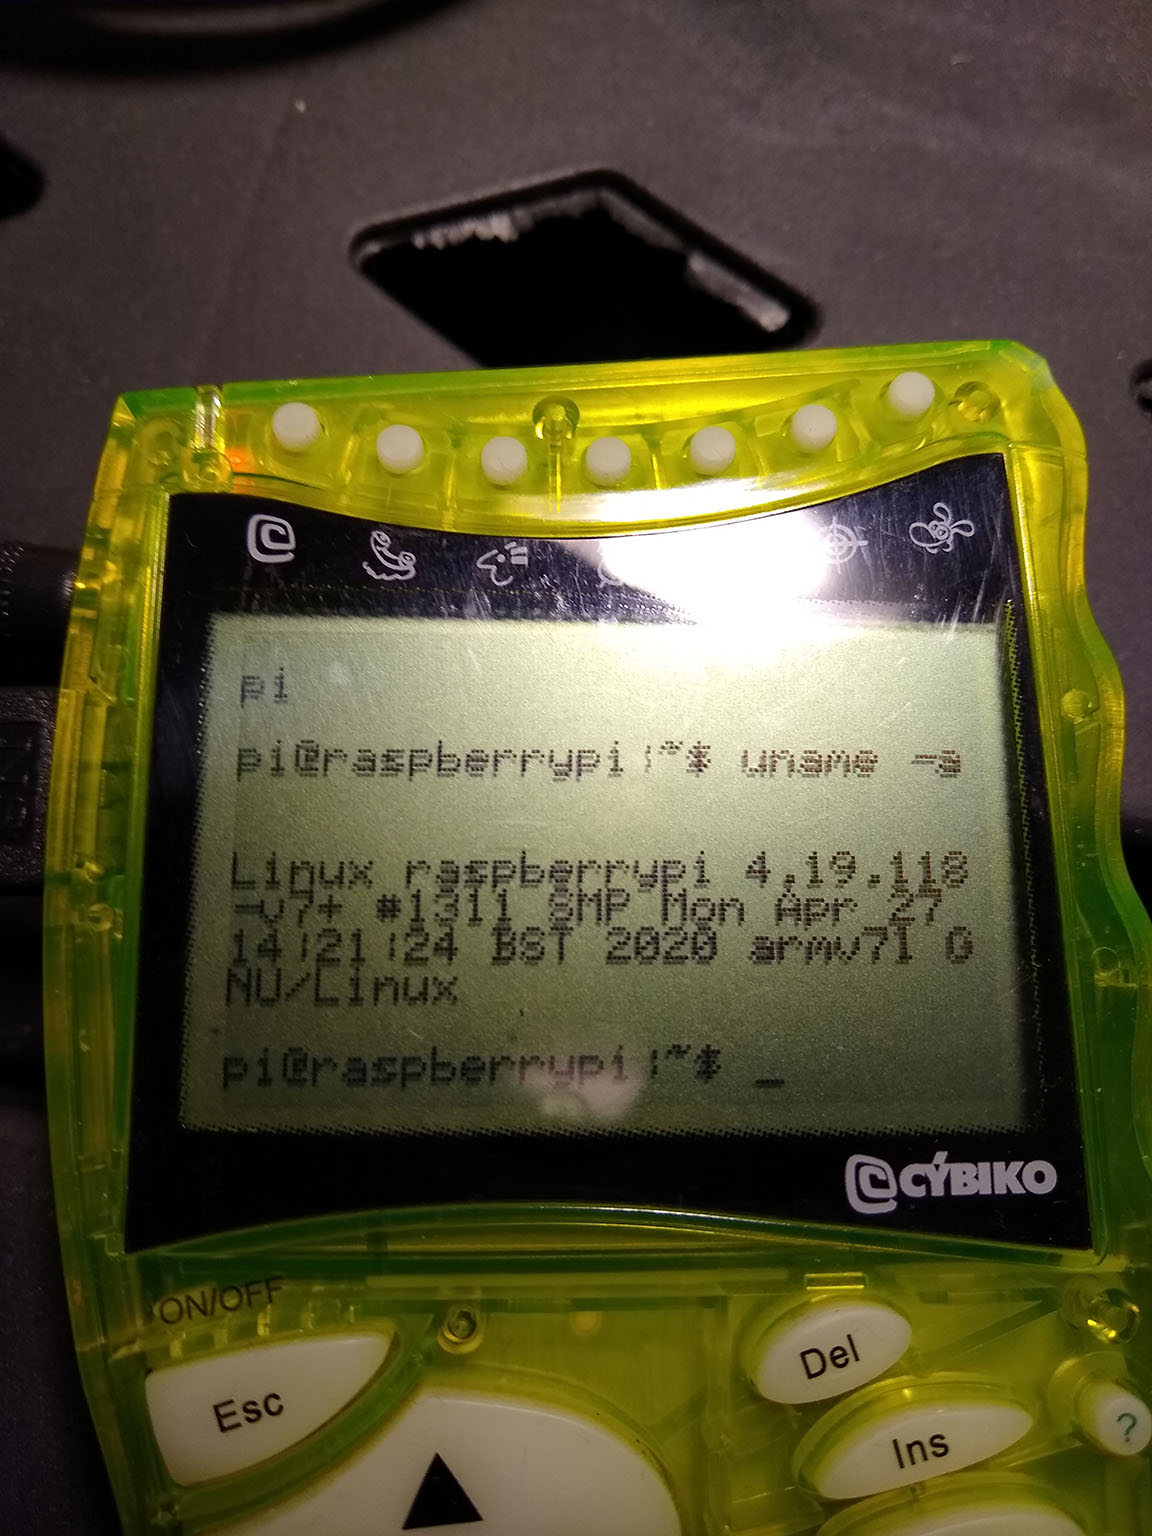
Look, I’m a Raspberry Pi!
Conclusion
At this point you should be successfully communicating with something via a Cybiko! There are a lot of options within RFTerm, so you may want to consult the documentation if you run into trouble or have a more complex use-case, http://www.dbzoo.com/cybiko/rfterm.
Is this all particularly practical? Of course not, but worst case scenario you now have a candy-colored pocket-sized terminal for when all else has failed you–perfect for when you are scavenging the dystopian wasteland!