Get Your Vintage Computer Online with a Lantronix UDS-10
I wanted to connect my vintage Wyse terminal to the Internet using a dedicated device, and after looking at the myriad of WiFi232 adapters I wondered if there was something that would behave similarly using a wired ethernet connection as I didn’t need wireless for my use-case.
Doing some research online, I discovered the Lantronix UDS series of devices, which looked perfect for what I wanted to do. Built for industrial and commercial purposes like interfacing RS232-based security systems and barcode scanners with modern networks, Lantronix devices like this seem to have been in production since the ’90s and are still being made today. The device is simple: plug an ethernet cable from your network into one end, and DB-25 cable from your serial device into the other. You can then use the UDS as something of a modem, allowing the connected device to act as a client and access different systems or a server to accept incoming connections.
Capabilities of Lantronix UDS units differ my model, but I settled on the UDS-10, a very old incarnation of this device. For use with retro computers and terminals, it is a perfect choice, allowing users to interface with it via standard Hayes modem commands to connect to telnet systems on the web like BBSes.
I was able to get a UDS-10 on ebay for around $10 (about 1/4 of the price of your average WiFi232 device). Note: Don’t buy any UDS-10 devices branded with “ChristieNET” as these appear to use a proprietary firmware that won’t work for anything we are trying to do.
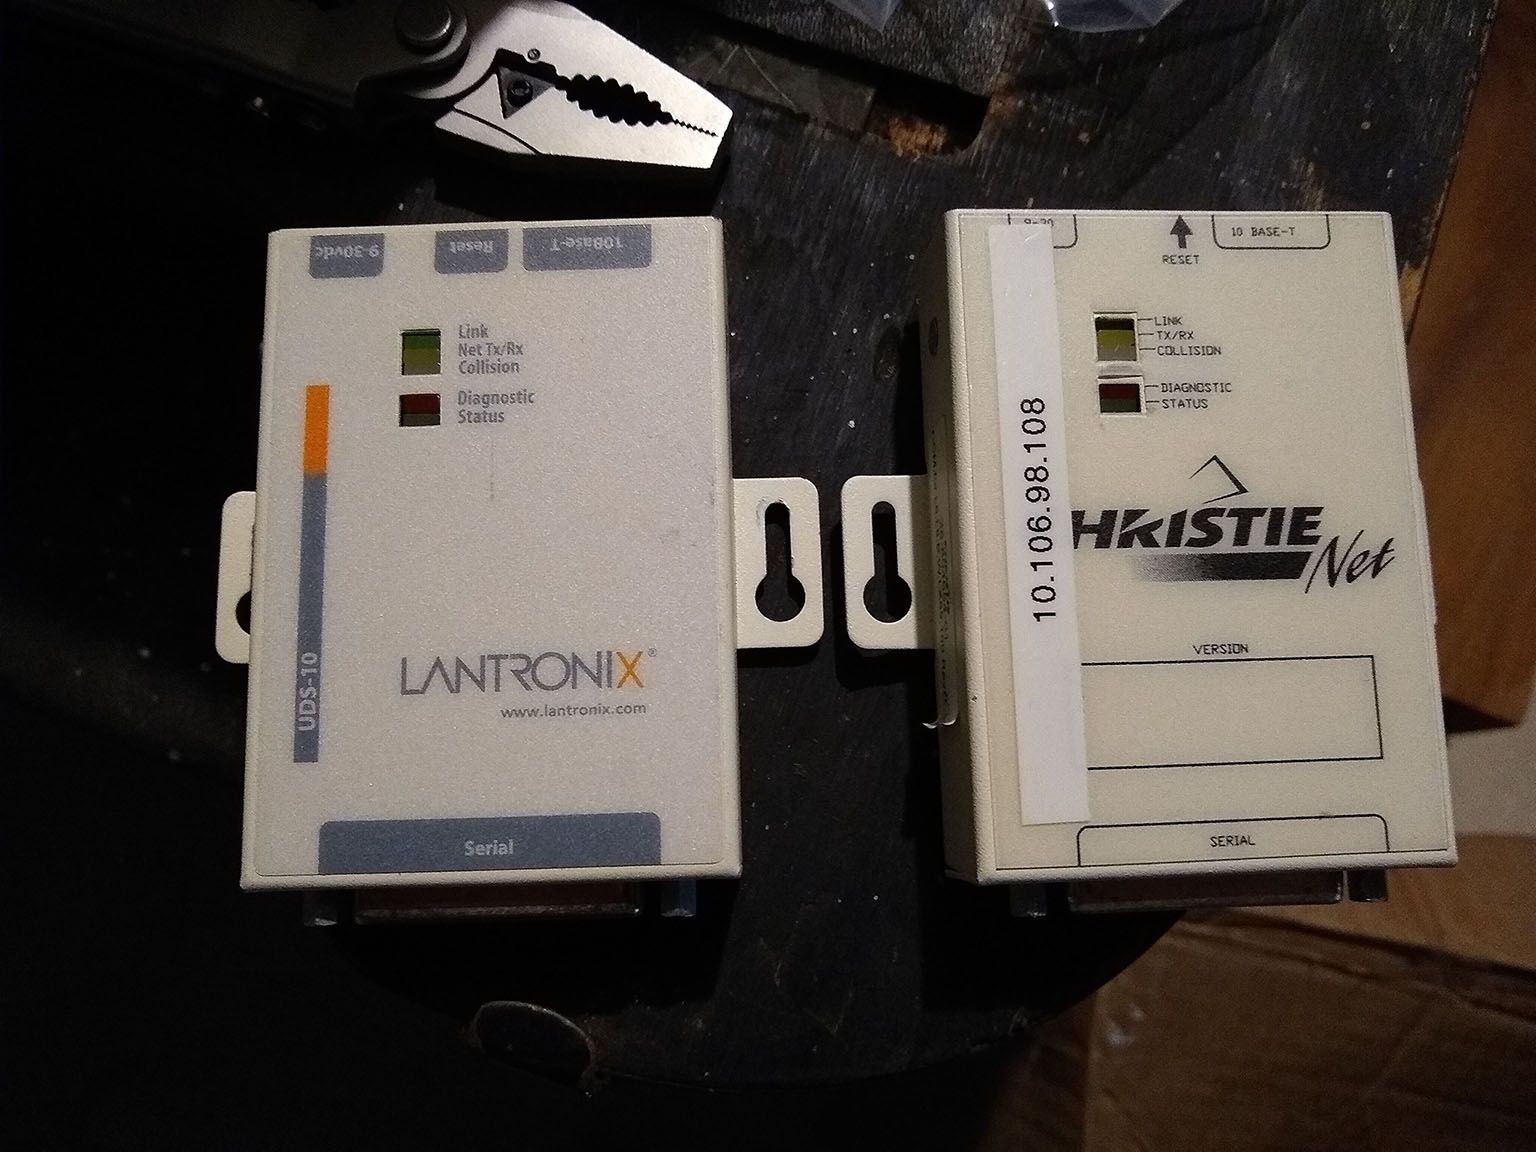
The left one is awesome, the right one is junk.
Setup
Initial configuration of the UDS-10 is done via serial at 9600bps. If your vintage computer can’t handle this speed, you can do your configuration through a more modern computer (which is what I opted to do via a USB/Serial adapter).
While the UDS-10 is unplugged from power, open up a serial session to it:
$ sudo screen /dev/ttyUSB0 9600
Now with this session open, hold down the x key on your keyboard while plugging in the UDS-10’s power adapter. After a few seconds you should get a message prompting you to press Enter for setup.
*** Lantronix Universal Device Server ***
Serial Number 0545783  MAC address 00204A05B2D7
Software version V5.8.0.1 (041112) LTX
Press Enter for Setup Mode
Pressing the Enter key on your keyboard will print out a summary of the current device configuration and give you some options for changing settings. If you want, you can type 7 to factory reset, but you’ll likely be moving through every menu anyway so it doesn’t really matter if you start out completely fresh.
*** basic parameters
Hardware: Ethernet TPI
IP addr - 0.0.0.0/DHCP/BOOTP/AutoIP, gateway 192.168.1.1,netmask 255.255.255.0
Telnet config password set
DHCP device name : uds10

*** Security
SNMP is              enabled
SNMP Community Name: public
Telnet Setup is      enabled
TFTP Download is     enabled
Port 77FEh is        enabled
Web Server is        disabled
ECHO is              disabled
Enhanced Password is disabled

*** Channel 1
Baudrate 9600, I/F Mode 4C, Flow 00
Port 00000
Connect Mode : D6
Auto increment source port disabled
Remote IP Adr: --- none ---, Port 00000
Disconn Mode : 00
Flush   Mode : 00
SendChars    : 00 03

*** Expert
TCP Keepalive    : 45s
ARP cache timeout: 600s
Monitor Mode @ bootup : enabled
HTTP Port Number : 80

Change Setup:
  0 Server
  1 Channel 1
  5 Expert
  6 Security
  7 Factory defaults
  8 Exit without save
  9 Save and exit            Your choice ?
Enter a 0 to configure server details. Current settings are shown in parenthesis. Here you will enter an IP address (pressing Enter after each octet), or enter all 0’s to use DHCP to automatically retrieve an IP. Set the gateway and netmask to whatever your network requires and then set a telnet password so you can configure settings via telnet in the future. Note that the password length is a laughable four characters. Finally, You can give the device a DHCP name.
Change Setup:
  0 Server
  1 Channel 1
  5 Expert
  6 Security
  7 Factory defaults
  8 Exit without save
  9 Save and exit            Your choice ? 0

IP Address : (000) .(000) .(000) .(000)
Set Gateway IP Address (Y) ?
Gateway IP addr (192) .(168) .(001) .(001)
Netmask: Number of Bits for Host Part (0=default) (8)
Change telnet config password (N) ? Y
Enter new Password: root
Change DHCP device name (uds10) ? (N) ?
Now you can configure the serial connection by entering a 1. I like to keep mine at 9600 baud and the I/F Mode can be set to 4C which is a hex code that means 8 bit, no parity, 1 stop bit. Everything else can be zero’d out except for ConnectMode which we will set to D6 for modem emulation with echo (so we can see what we type).
Change Setup:
  0 Server
  1 Channel 1
  5 Expert
  6 Security
  7 Factory defaults
  8 Exit without save
  9 Save and exit            Your choice ? 1

Baudrate (9600) ?
I/F Mode (4C) ?
Flow (00) ?
Port No (0) ?
ConnectMode (D6) ?
Auto increment source port  (N) ?
Remote IP Address : (000) .(000) .(000) .(000)
Remote Port  (0) ?
DisConnMode (00) ?
FlushMode   (00) ?
DisConnTime (00:00) ?:
SendChar 1  (00) ?
SendChar 2  (00) ?
You can review the expert settings by entering 5. I didn’t see anything that I needed to change here.
Change Setup:
  0 Server
  1 Channel 1
  5 Expert
  6 Security
  7 Factory defaults
  8 Exit without save
  9 Save and exit            Your choice ? 5

TCP Keepalive time in s (1s - 65s; 0s=disable):  (45) ?
ARP Cache timeout in s (1s - 600s) :  (600) ?
Disable Monitor Mode @ bootup (N) ?
HTTP Port Number :  (80) ?
Now you can enter 6 to update security settings. If you are running this on a home network you are probably fine keeping things at default values. The web interface on these devices uses some old version of Java, and it was buggy even when I managed to get a browser to allow me to run it, so I just turned off the web interface here.
Change Setup:
  0 Server
  1 Channel 1
  5 Expert
  6 Security
  7 Factory defaults
  8 Exit without save
  9 Save and exit            Your choice ? 6

Disable SNMP (N) ?

SNMP Community Name (public):

Disable Telnet Setup (N) ?

Disable TFTP Firmware Update (N) ?

Disable Port 77FEh (N) ?

Disable Web Server (Y) ?

Disable ECHO ports (N) ?

Enable Enhanced Password (N) ?
Finally, you can enter a 9 to save settings which will disconnect you and reboot the device.
Change Setup:
  0 Server
  1 Channel 1
  5 Expert
  6 Security
  7 Factory defaults
  8 Exit without save
  9 Save and exit            Your choice ? 9

Parameters stored ...

NO CARRIER
Assuming that your device is now connected to your network, you can configure it further via telnet on port 9999 if you ever want to tweak these settings.
Connect to a BBS
Due to the insecure nature of telnet, you won’t find a ton of services being hosted through it on the Internet besides bulletin board systems. If you wanted to, you could always run a telnet daemon on a server within your home network, but to test the UDS, connecting to a running BBS will do just fine.
With the UDS connected to your vintage computer/terminal, open a connection with it at 9600 baud (or whatever rate you chose during setup). You can now use some basic Hayes commands to telnet a BBS.
I will connect to the Level 29 BBS at bbs.fozztexx.com however the UDS-10 doesn’t understand DNS so I need to retrieve the IP address of the BBS through a ping command to resolve bbs.fozztexx.com to 50.79.157.209 before attempting a connection.
Now in my open session, I’ll connect to 50.79.157.209 on port 23 by typing ATDT50.79.157.209/23 and hitting the Enter key.
If all goes well it should connect! To disconnect, simply log out of the BBS and enter +++ATH.
ATDT50.79.157.209/23
CONNECT


Welcome to the *NEW* Level 29 BBS!
916 965 1701 - bbs.fozztexx.com

              __
  ___________/__\___________
 /   _  _  -__ -   ___  -   \
 \__________________________/
             |  |
             |  |
        _____|  |______
    ___|     |  |      |___
   |   |     |  |      |   |
___|___|____/____\_____|___|___
                        __   __
|     __        __  |  /  \ /  \
|    /__\ |  | /__\ |   __/ \__/
|___ \__   \/  \__  |  /___   /

The official BBS of
RetroBattlestations.com


Enter your username or NEW or VISITOR
User: +++ATH0
Password:
Invalid user or password
Enter your username or NEW or VISITOR
User:

NO CARRIER
+++ATH0
OK
Conclusion
That’s all there is to it! In the future I hope to figure out how to configure the UDS-10 as a server instead of a client so I can access serial devices via my home network.
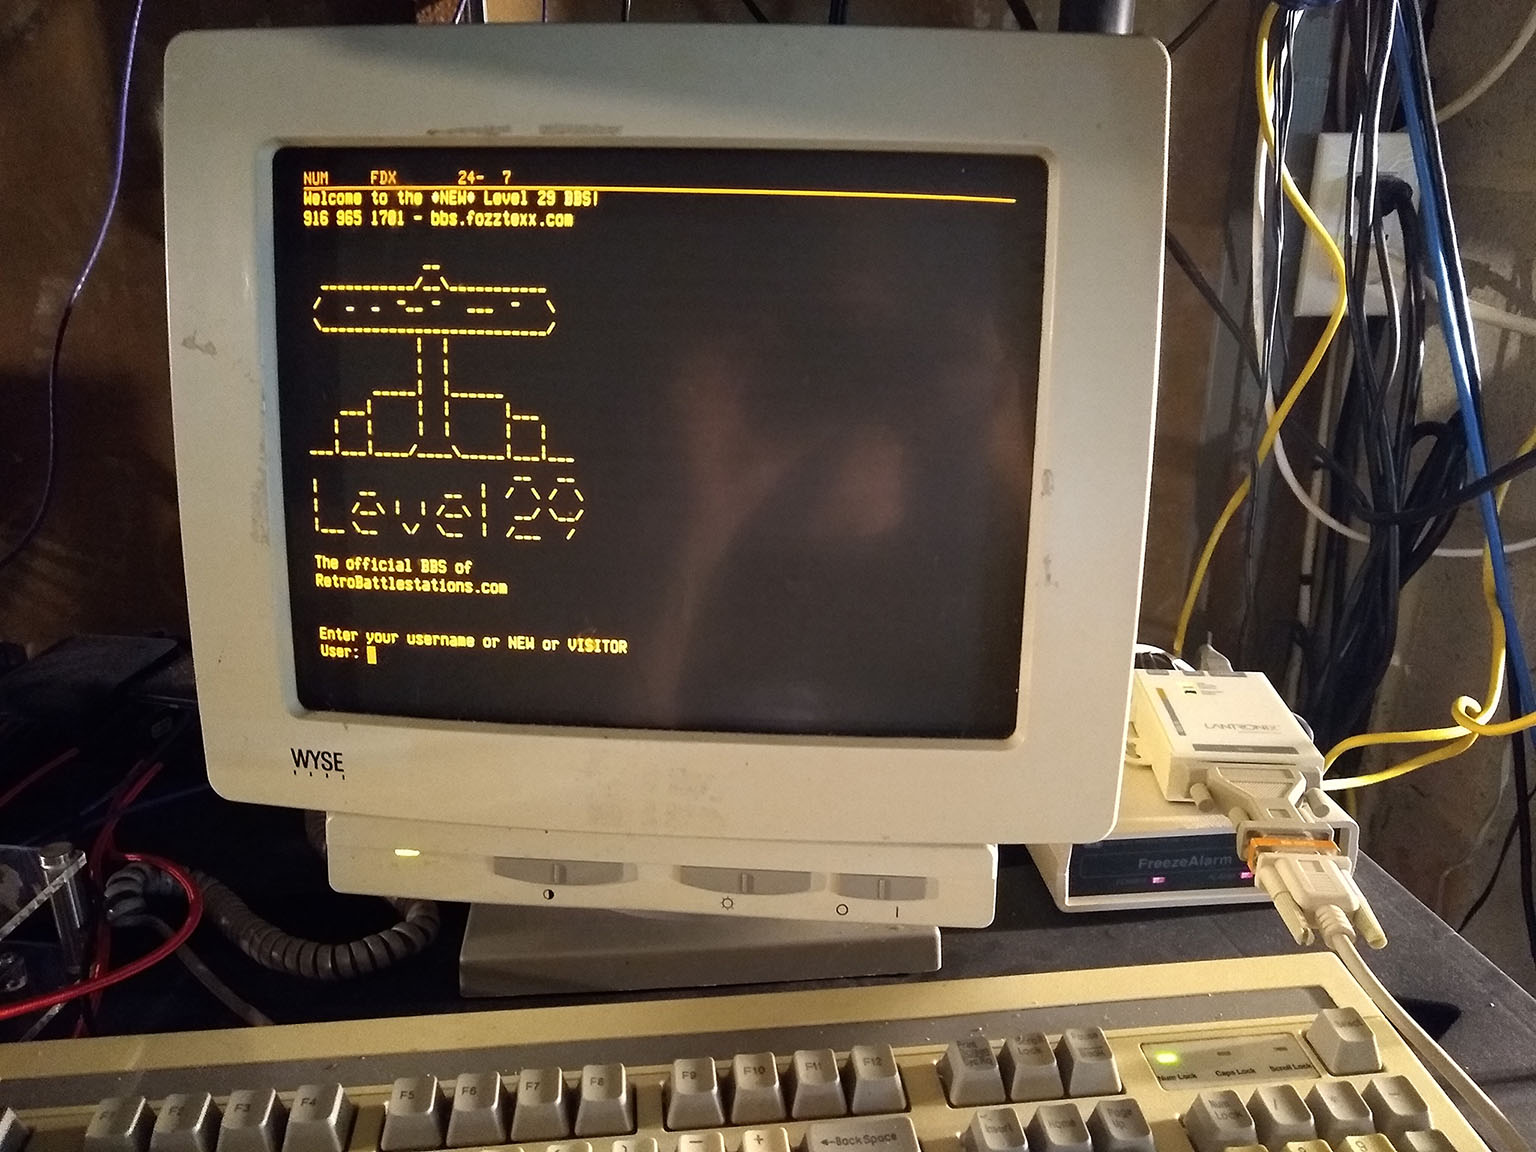
BBSing in style.