Upgrading WiFi on the ThinkPad X230
If you have gone ahead and installed coreboot on a ThinkPad X230, you may be aware that one of the features of the new firmware is the removal of the “WiFi whitelist” which only allowed certain wireless cards to be used on the machine. While this probably wasn’t much of an issue when the X230 first came out, wireless networking is much faster these days and the X230 can be upgraded to take advantage of these increased speeds relatively inexpensively.
The existing wireless card in my ThinkPad is an Intel Wireless-N card that only supports the 2.4GHz band. After doing some research, I decided to purchase an Intel Wireless-AC 7260 half-size mini PCIe card from eBay for around $15. This will provide dual-band support, and also boasts Bluetooth 4.0 (but I’ll probably never use that).
To install the new card, we only need a crosshead screwdriver. If you followed my guide for corebooting the X230, a lot of this will be very familiar.
First, make sure that the X230 is disconnected from its charger, and then flip it over so the bottom of the laptop faces up. Then remove the battery.
Remove the following seven screws and put them in a safe place.
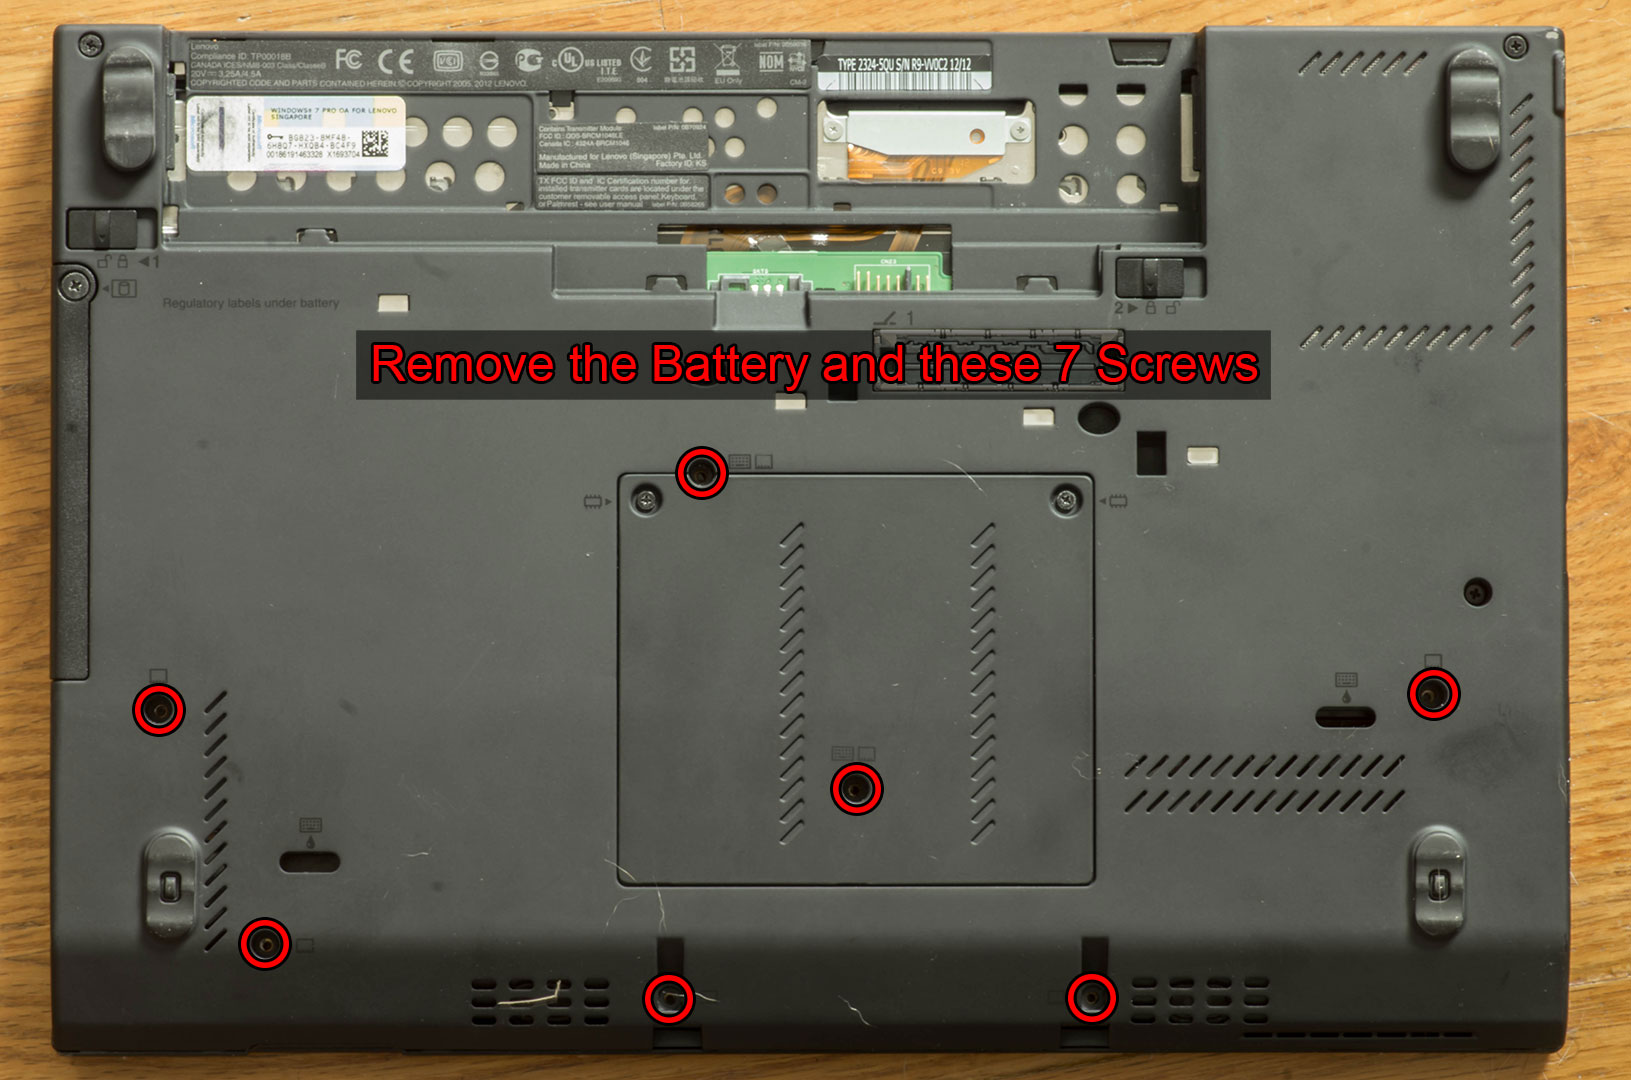
Screw removal guide via chucknemeth.com.
Next, flip the laptop back over and open it up (as though you were going to use it). The screws taken out will allow the keyboard and palm rest to come out, so we will take them out in that order.
Gently slide the keyboard toward the screen (you may want to get your fingernail under the bottom edge) and flip it up against the screen being careful of the ribbon cable attaching it to the motherboard. It isn’t necessary to disconnect the keyboard as it can be angled out of the way as-is. Then, pop out the palm rest and again gently move it up near where they keyboard had been sitting (again minding the connector cable).
To the bottom right of the motherboard, you should see the existing WiFi card screwed down with two antenna wires connected to it.
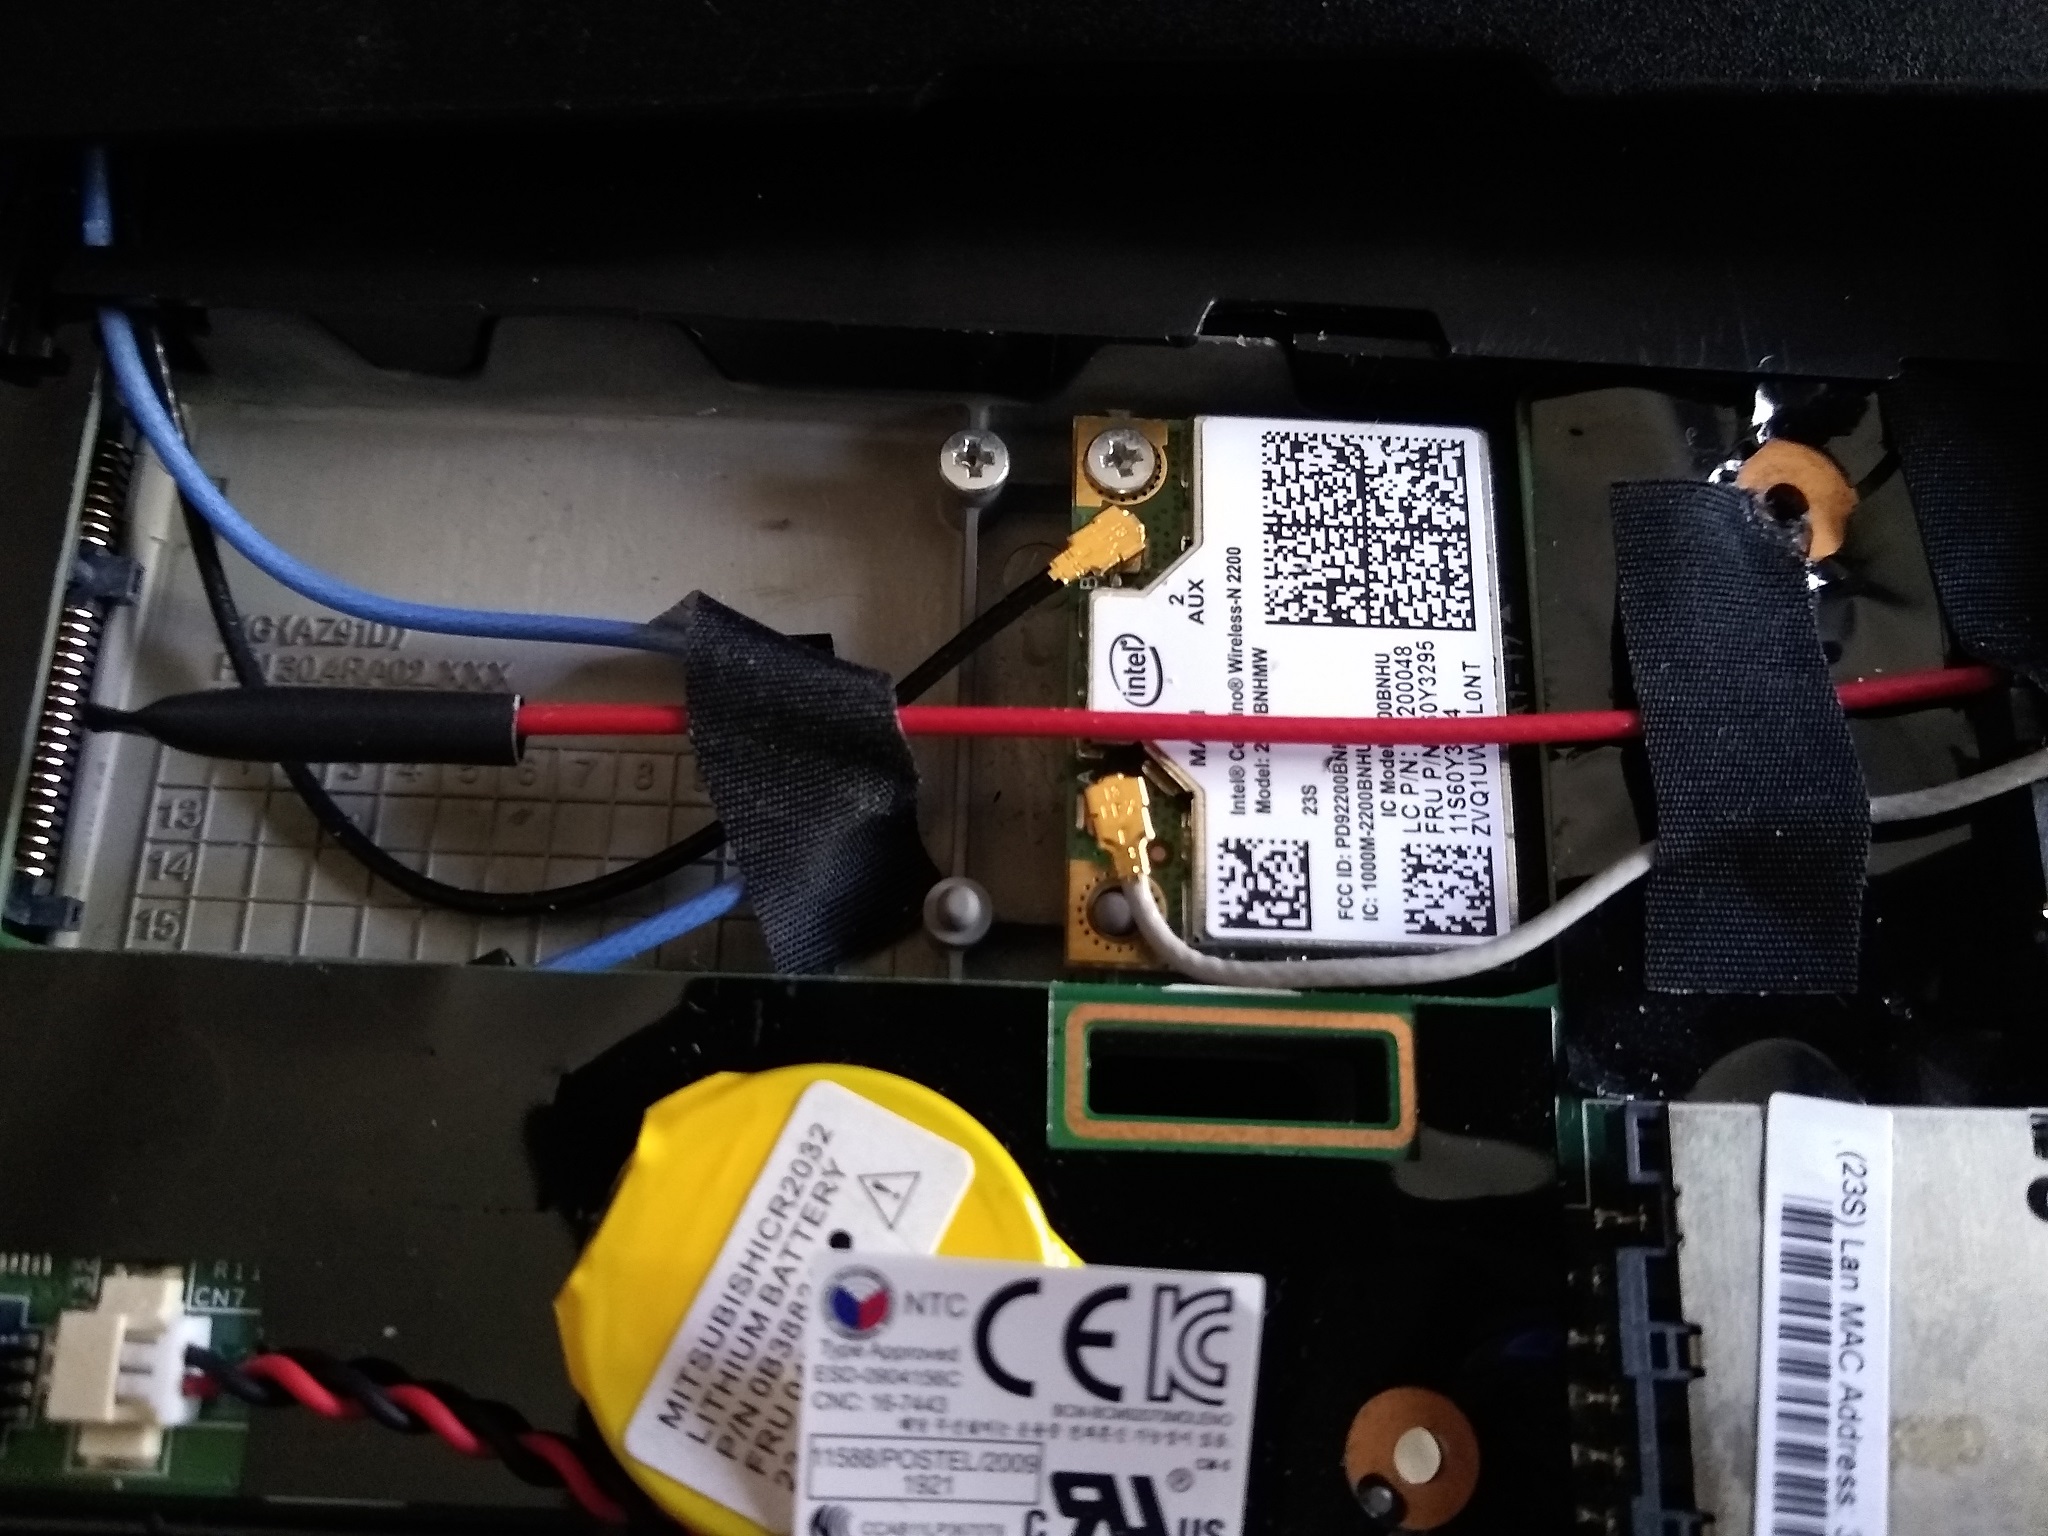
The old WiFI card.
Gently pry the antenna leads off the card and then unscrew the single screw securing the card in the top corner. The card should easily slide out when done.
Below is a side-by-side of the new card and the old card. The new card I received appears genuine but has stickers on it from the seller, which I believe is to get around paying some sort of export duty. They used a type of sticker that doesn’t peel away cleanly, so I decided to just leave the card as is. I did, however, obfuscate their logo because I don’t need to advertise them doing this.
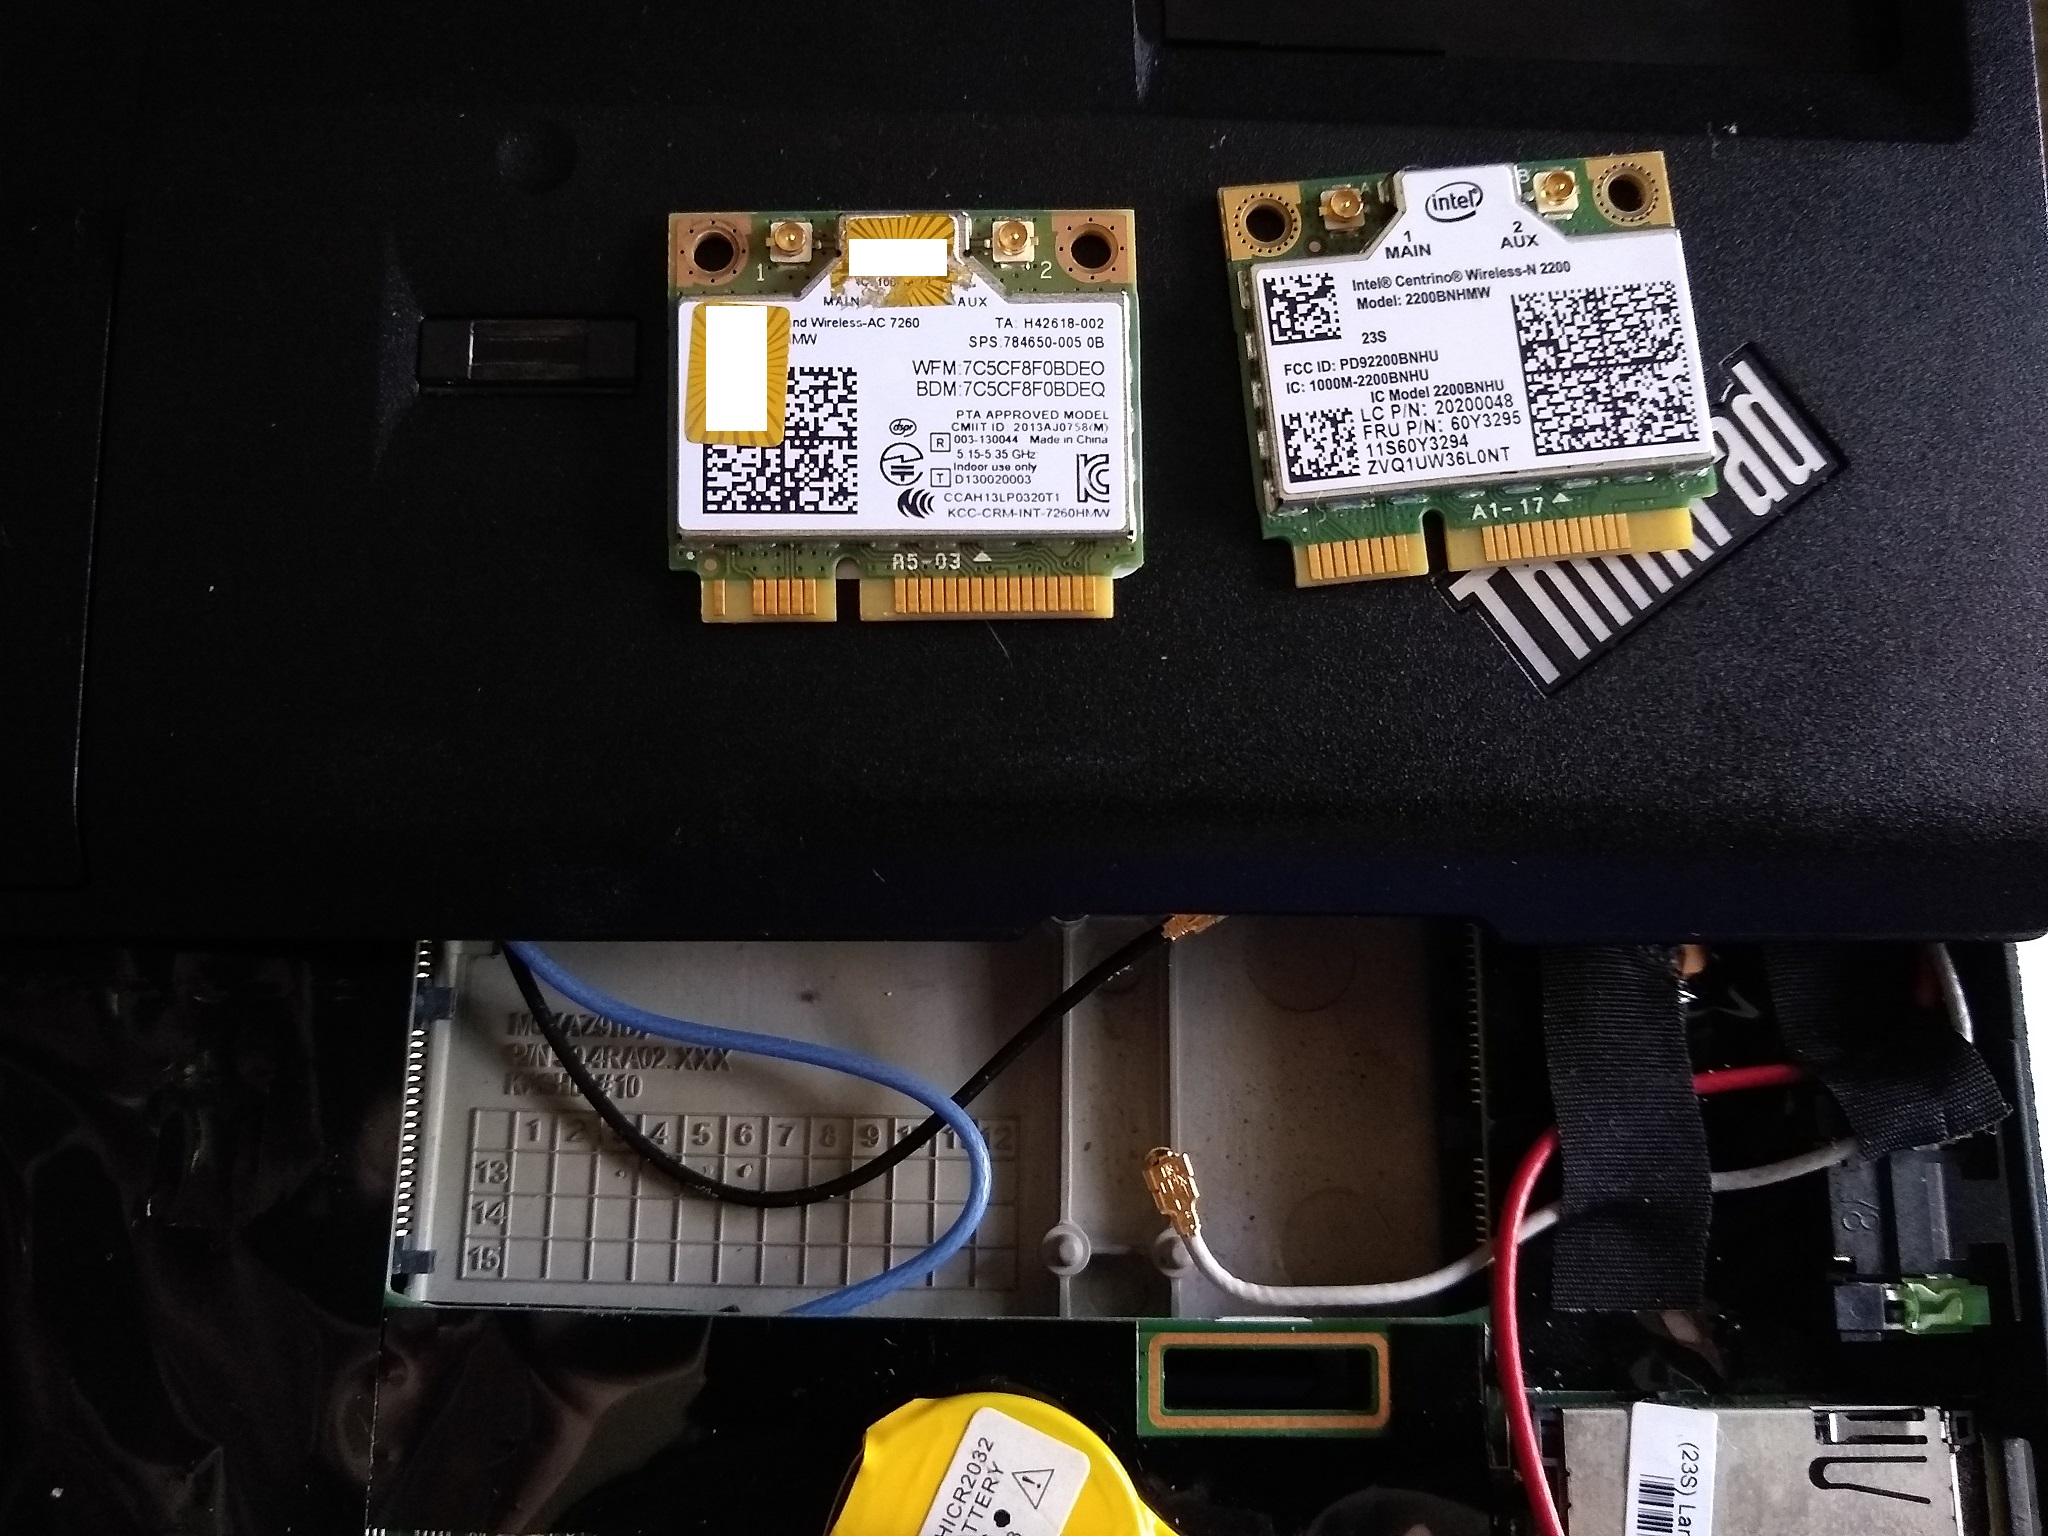
The two WiFi cards.
Installing the new card is about as easy as removing the old one. Simply line up the edge of the card with the slot on the right, screw it in place, and reattach the antennas.

The new card in place!
That’s all there is to it! You can reassemble and boot the laptop to check that everything is working as expected. I was able to connect to both 2.4GHz and 5GHz networks, but I also checked the device to make sure I got the chip I was expecting:
$ lspci
...
02:00.0 Network controller: Intel Corporation Wireless 7260 (rev 73)
$ lspci -vv -s 02:00.0
02:00.0 Network controller: Intel Corporation Wireless 7260 (rev 73)
Subsystem: Intel Corporation Dual Band Wireless-AC 7260
Control: I/O- Mem+ BusMaster+ SpecCycle- MemWINV- VGASnoop- ParErr- Stepping- SERR- FastB2B- DisINTx+
Status: Cap+ 66MHz- UDF- FastB2B- ParErr- DEVSEL=fast >TAbort- SERR-
Kernel driver in use: iwlwifi
Kernel modules: iwlwifi