Corebooting the ThinkPad X230 with Skulls
I had been looking for an inexpensive-but-capable laptop that I could take to conventions/meetups in place of my much larger (and heavier) Clevo laptop that usually took up way too much space in my bag. I’m not editing videos or gaming at these places (or otherwise anymore, really), and the most I’m probably doing is taking notes, browsing the web, presenting a slideshow, or running some lightweight console-based software. I certainly don’t need a high-end machine.
Additionally, I wanted a machine I didn’t have to worry about as much. My Clevo is an expensive workhorse, and I can have quite a bit of data sitting on it at any given time. It wouldn’t be the end of the world if the machine was damaged, but it would be a nuisance. With an inexpensive machine, I’m less bothered about someone stealing it or having it damaged when I’m out and about.
I decided to take a look at older ThinkPad models, as they are something of the golden standard in terms of durable, portable workstations these days. I decided to go a bit older and initially looked at X200 models as I knew they were inexpensive and reasonably upgradable, but strangely they seem to have taken a price hike over the past few months where they cost 2-3 times as much as they did last year. I decided to settle on the slightly newer X230 model that featured better specifications when compared to the X200, but was about the same price on the second-hand market. I was able to secure a unit with an Intel i5-3230m@2.6GHz and 8 GB of RAM for somewhere between $100-$150.
ThinkPads are generally Linux-friendly, but before dealing with a fresh operating system install, I ordered an SSD (a Samsung SSD 860 EVO 250GB) to replace the stock hard disk. Installation of the SSD took about two minutes, and then I went ahead and and installed Debian to the drive with full disk encryption and Xfce as a lightweight desktop environment to reduce the potential of sluggishness.
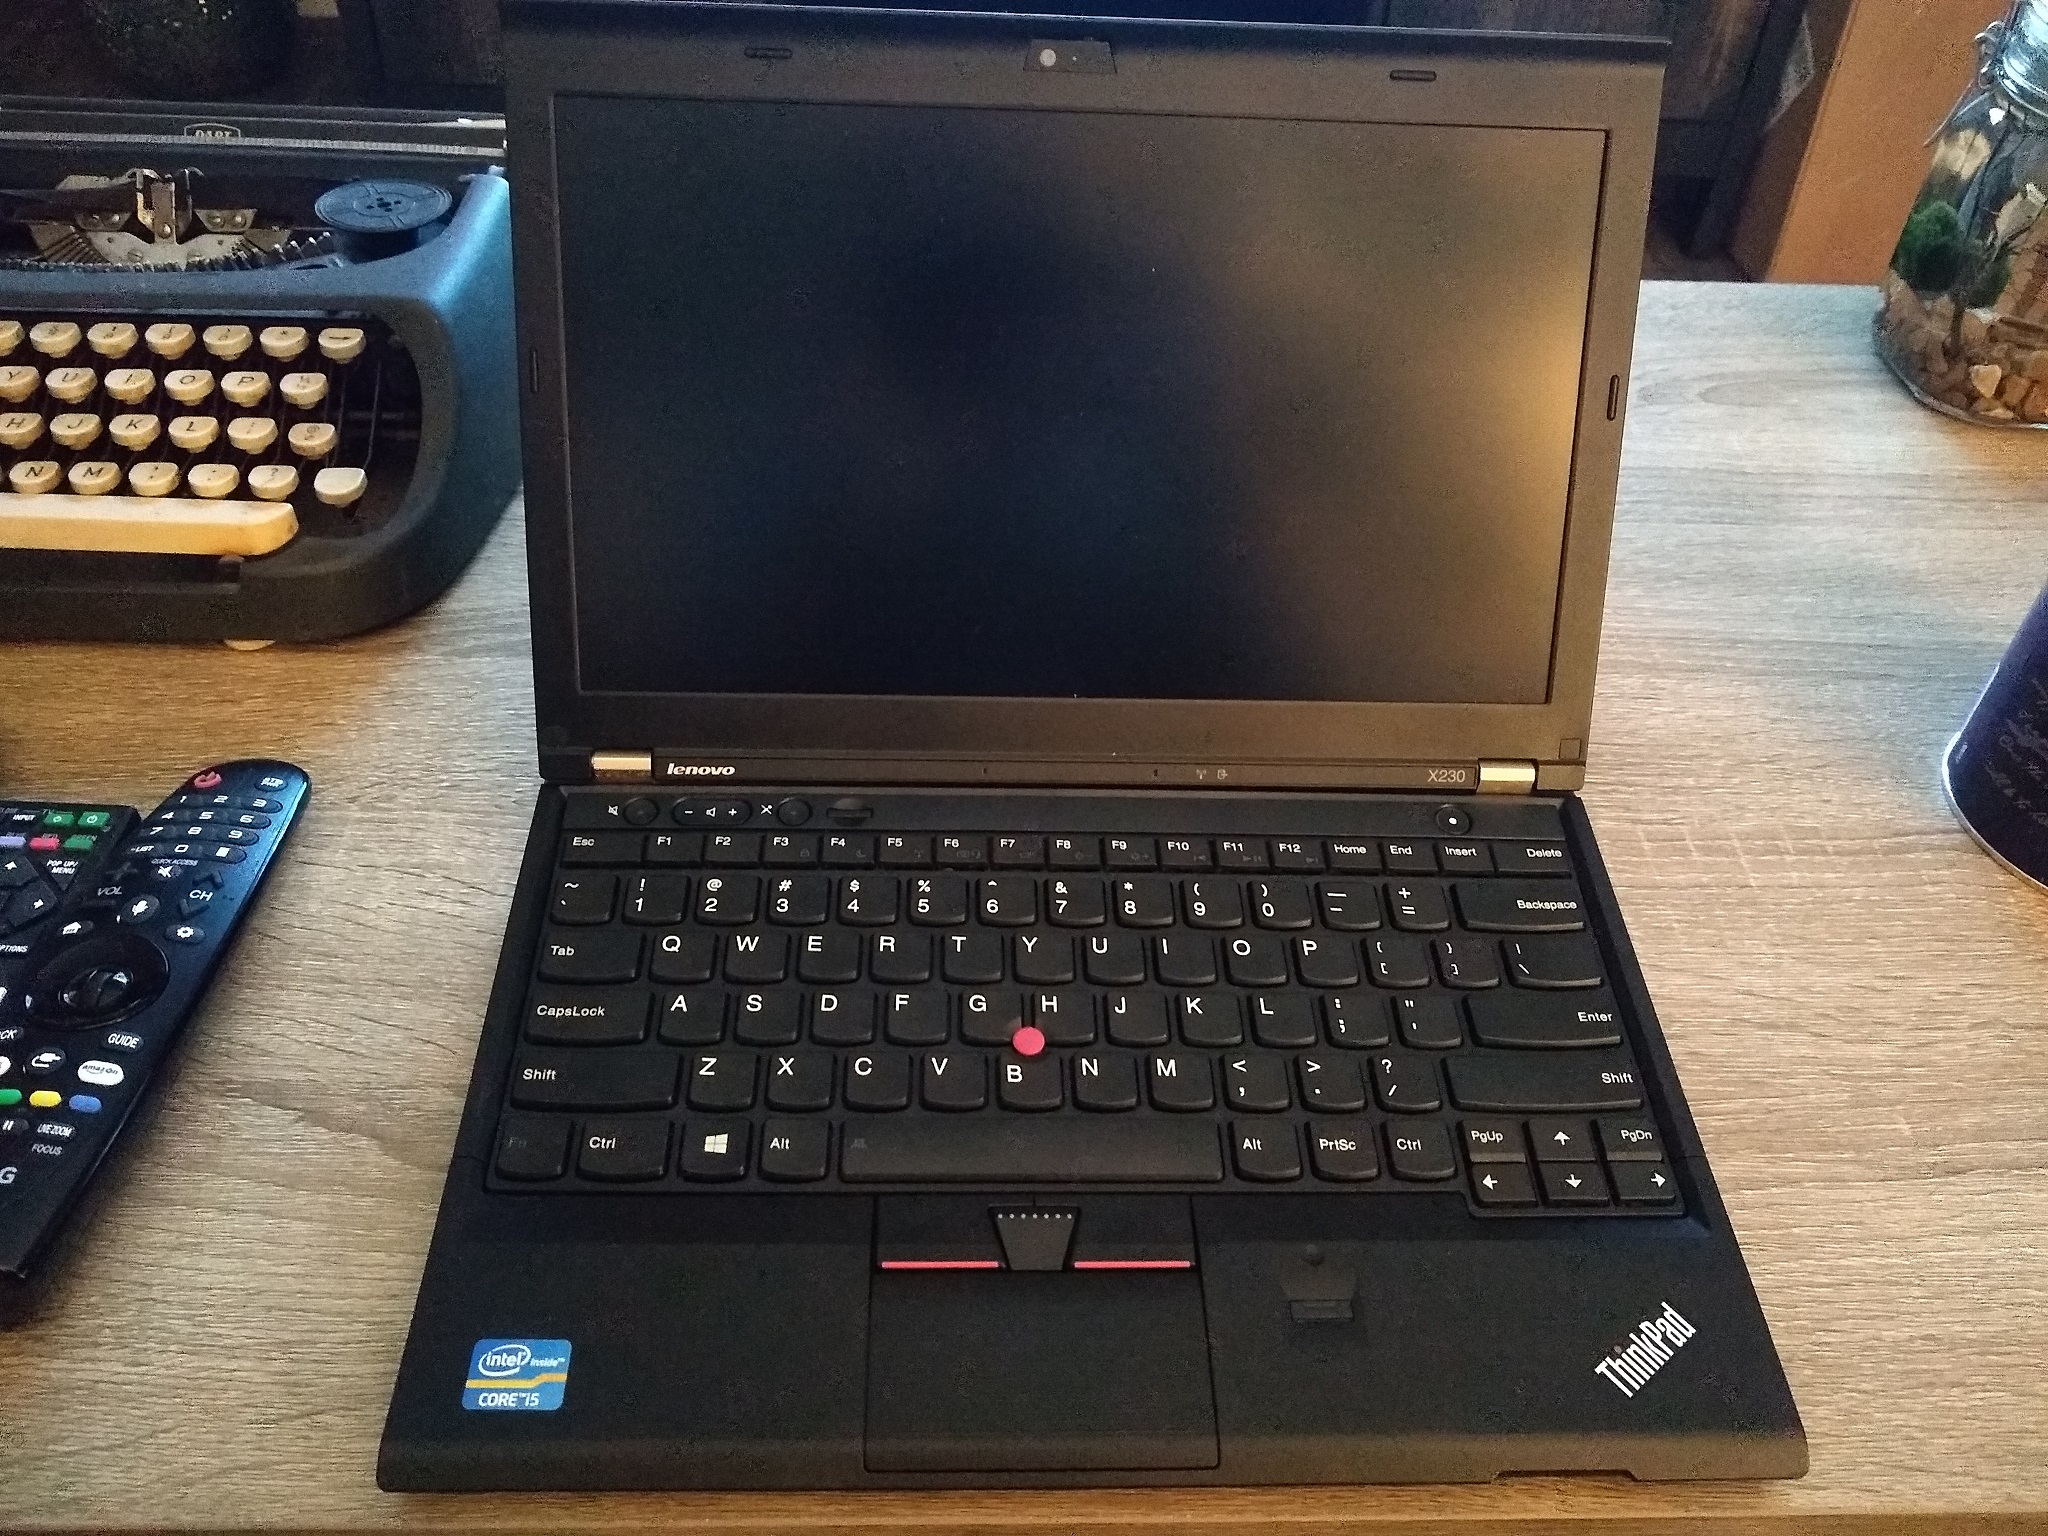
The majestic ThinkPad X230.
Getting WiFi to Work
I performed the installation with the help of a wired LAN connection because the X230’s WiFi card uses non-free firmware. After the OS installation was finished up and I could log into the system, this was easily rectified. Make sure you add non-free to each line in /etc/apt/sources.list:
# cat /etc/apt/sources.list

deb http://deb.debian.org/debian/ buster main non-free
deb-src http://deb.debian.org/debian/ buster main non-free

deb http://security.debian.org/debian-security buster/updates main non-free
deb-src http://security.debian.org/debian-security buster/updates main non-free

# buster-updates, previously known as 'volatile'
deb http://deb.debian.org/debian/ buster-updates main non-free
deb-src http://deb.debian.org/debian/ buster-updates main non-free
Then, (as root or using sudo) install firmware-iwlwifi:
# apt update
# apt install -y firmware-iwlwifi
What is Coreboot?
Part of my interest when originally pursuing an X200 was the possibility of installing the Libreboot firmware, a free (as in speech) BIOS/UEFI replacement that doesn’t have any binary blobs or backdoors. I’m a freedom-loving computer user with a penchant for privacy, but unfortunately Libreboot isn’t available for the X230.
Luckily, I learned about coreboot, which happens to be Libreboot’s main upstream provider. coreboot still relies on some binary blobs, but aims to be an open-source project that boasts speed and security through alternative firmware.
I decided I’d give it a try using Skulls, a project that creates pre-built coreboot images that are easy to flash. coreboot isn’t something that can just be installed via the host operating system, you have to physically open the machine up and flash 1-2 chips soldered to the machine’s motherboard. Luckily this can be done with some inexpensive hardware that I will outline below.
Before You Flash
While you cannot flash the firmware in the host operating system, you can use it do perform a check to make sure the existing firmware is in a state that CAN be flashed.
On your host operating system, run the following to install dmidecode and print out relevant system information:
$ sudo apt-get install dmidecode
$ git clone https://github.com/merge/skulls.git
$ cd skulls/x230
$ sudo ./x230_skulls.sh
If all goes well, you won’t get a message that says “The installed original BIOS is very old.” which would indicate that you probably want to perform an update to the existing Lenovo BIOS before proceeding with coreboot. If you do get this message, the Skulls guide has outlined some steps you can take to perform this update.
Necessary Hardware
There are a few different ways to install coreboot onto a ThinkPad x230 as outlined in the Skulls documentation, but I will run through my setup below as I know it works.
One thing I had to buy was a Pomona SOIC9 Test Clip 5250 (though I have heard clones from AliExpress work pretty well). This will actually clip onto the chips on the motherboard so you don’t need to desolder them. You will connect this clip to a flashing device via some female-to-female jumper wires like these before attaching to a chip, but we’ll get to that part soon.
My main flashing device was a Raspberry Pi 3B (with power cord, microSD card, and Ethernet connection). I installed the latest Raspbian on it, booted it up, and then prepared it for flashing with a few simple steps.
First, we will need to make sure UART is enabled, so drop into a root shell and modify /boot/config.txt to be sure the following options are set:
enable_uart=1
dtparam=spi=on
Next, modify /etc/modules to make sure the following modules will be loaded:
spi_bcm2835
spidev
Now we will install flashrom and get the latest Skulls release ready for flashing (check here for fresh release links to wget):
# apt-get install -y flashrom
# wget https://github.com/merge/skulls/releases/download/0.1.10/skulls-x230-0.1.10.tar.xz
# tar -xf skulls-x230-*.tar.xz
Finally, shut down the Pi:
# shutdown -h now
At this point the Raspberry Pi should be off, so unplug its power cord before proceeding to the next step.
Opening the X230
The X230 is surprisingly easy to open up, requiring the removal of just a handful of screws. Make sure that the X230 is disconnected from its charger, and then flip it over so the bottom of the laptop faces up. Now, remove the battery and get your crosshead screwdriver ready.
Remove the following seven screws and put them in a safe place.
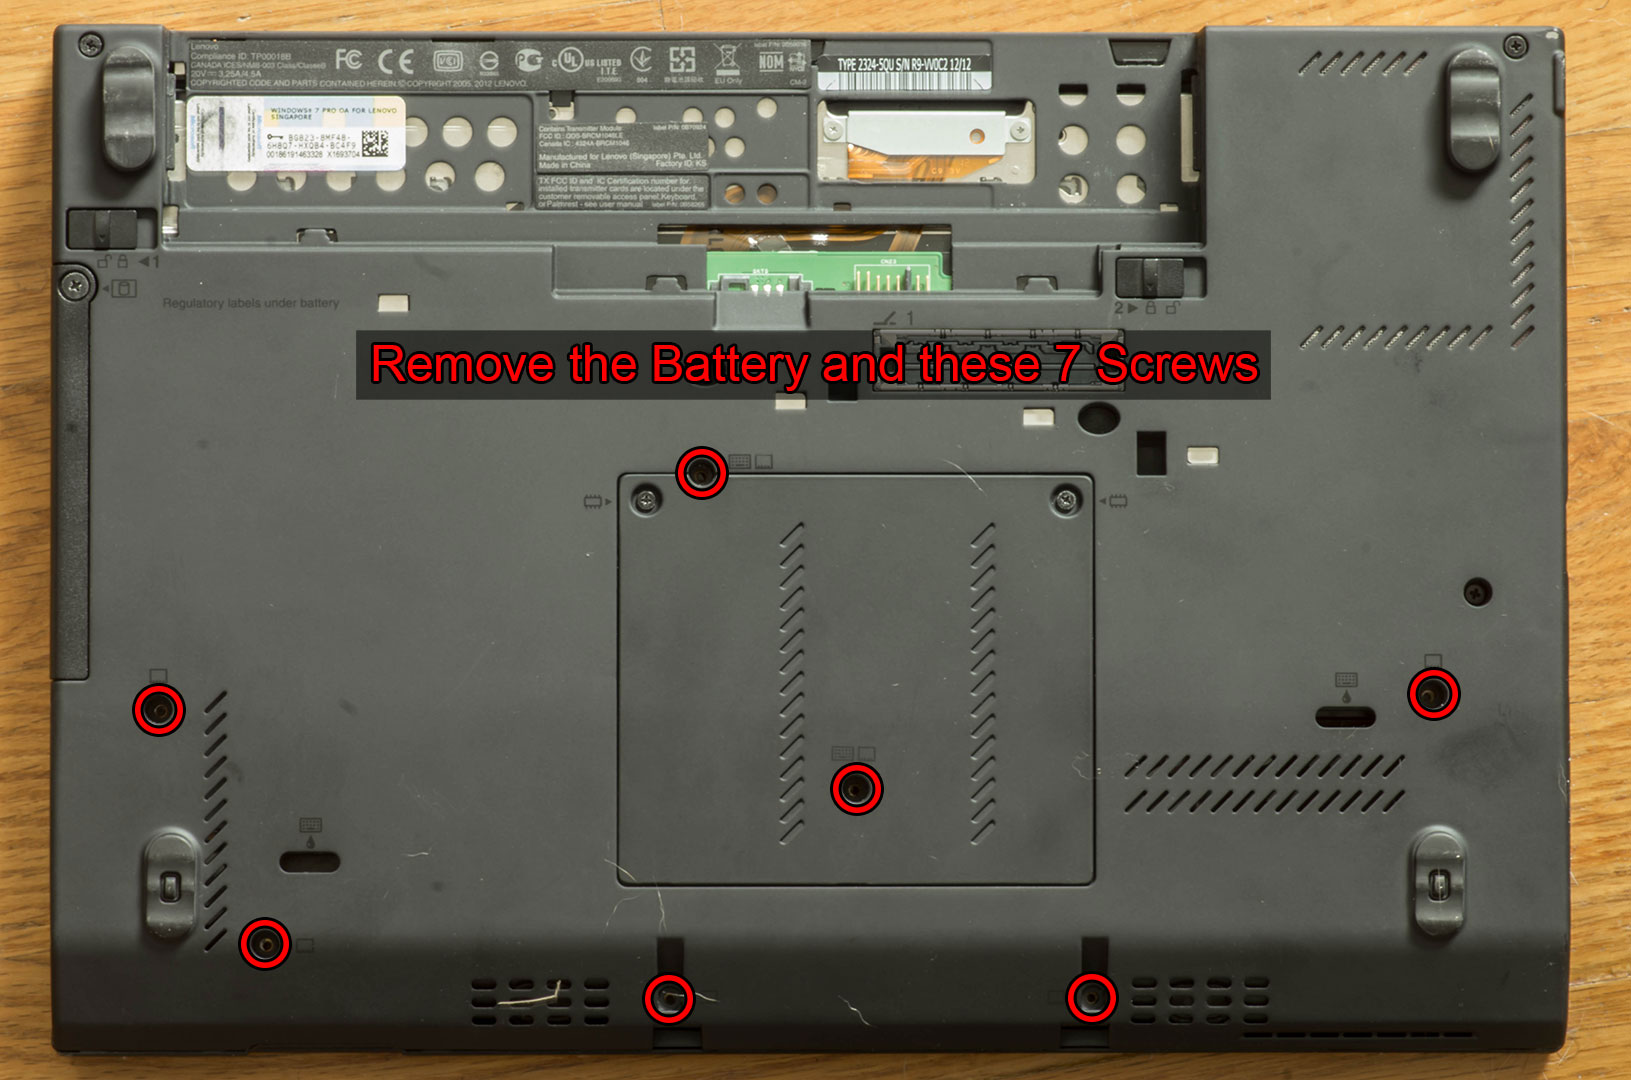
Screw removal guide via https://www.chucknemeth.com/laptop/lenovo-x230/flash-lenovo-x230-coreboot.
Next, flip the laptop back over and open it up (as though you were going to use it). The screws taken out will allow the keyboard and palm rest to come out, so we will take them out in that order.
Gently slide the keyboard toward the screen (you may want to get your fingernail under the bottom edge) and flip it up against the screen being careful of the ribbon cable attaching it to the motherboard. It isn’t necessary to disconnect the keyboard as it can be angled out of the way as-is. Then, pop out the palm rest and again gently move it up near where they keyboard had been sitting (again minding the connector cable).
You should notice a black film on the motherboard where the palm rest was. Peel up the bottom left corner of this film to reveal two chips, and tape the corner of the film down so it is out of the way as shown below.

The two chips exposed!
Connecting the X230 and RPi
Now it is time to wire the clip to the Raspberry Pi 3. Below are two diagrams: one for the chips and one for the Raspberry Pi header. Making sure you keep track of your clip’s orientation, connect the pins from the clip to the pins on the header as indicated. Note: If you are using a different model of Raspberry Pi, your pinout might be different so be sure to verify the chip pinout against a pinout from your Pi’s model.
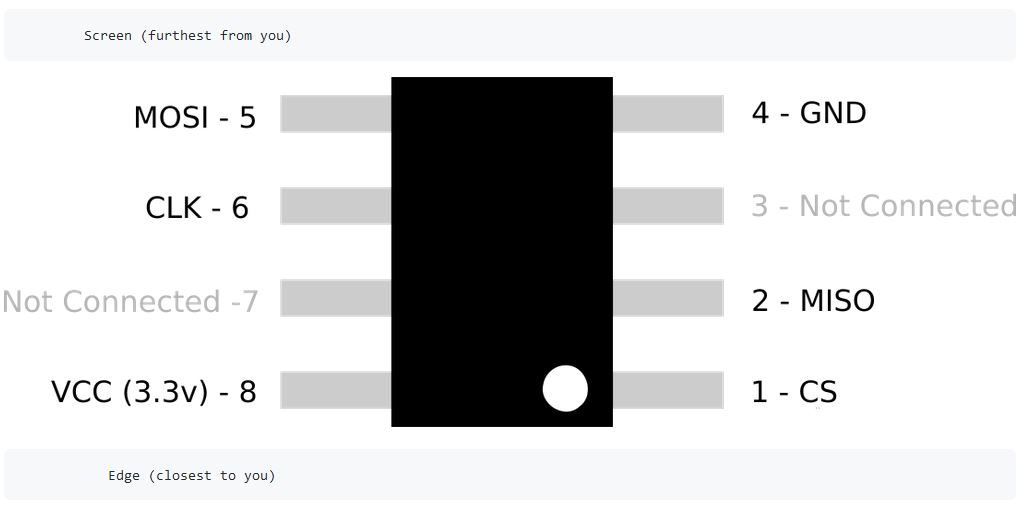
Clip pinout, via https://github.com/merge/skulls/blob/master/x230/README.md#open-up-the-x230.
Edge of pi (furthest from you)
                 (UART)
   L           GND TX  RX                           CS
   E            |   |   |                           |
   F +---------------------------------------------------------------------------------+
   T |  x   x   x   x   x   x   x   x   x   x   x   x   x   x   x   x   x   x   x   x  |
     |  x   x   x   x   x   x   x   x   x   x   x   x   x   x   x   x   x   x   x   x  |
   E +----------------------------------^---^---^---^-------------------------------^--+
   D                                    |   |   |   |                               |
   G                                   3.3V MOSIMISO|                              GND
   E                                 (VCC)         CLK
     Body of Pi (closest to you)
(Raspberry Pi 3 pinout, via github.com/merge/skulls/blob/master/x230/README.md)
Flashing
Now we can start the flashing process! Flashing the bottom chip is optional, but does have two main benefits: it allows you to do subsequent coreboot flashes through software (without needing to disassemble the machine) and it also disables functionality of Intel’s Management Engine which can be a security concern otherwise. I opted to flash the bottom chip, so after I ensured that my clip was wired to the Raspberry Pi properly, I attached my clip to the bottom chip and gave it a wiggle to ensure a snug connection.
Next, I powered up the Raspberry Pi and logged into it so I could navigate to the Skulls release I downloaded earlier:
# cd skulls-x230-*
Now we perform the flash on the bottom chip (and create a backup) using one command below. This can take around 10 minutes, so be patient (and make sure you don’t touch anything!):
# ./external_install_bottom.sh -m -k bottom.bak
Skulls for the X230

Please select the hardware you use:
1) Raspberry Pi
2) CH341A
3) Exit
Please select the hardware flasher: 1
Ok. Run this on a Rasperry Pi.
trying to detect the chip...
Detected MX25L6406E/MX25L6408E.
make: Entering directory '/root/skulls-x230-0.1.9/util/ifdtool'
gcc -O2 -g -Wall -Wextra -Wmissing-prototypes -Werror -I../commonlib/include -c -o ifdtool.o ifdtool.c
gcc -o ifdtool ifdtool.o
make: Leaving directory '/root/skulls-x230-0.1.9/util/ifdtool'
Intel ME will be cleaned.
The flash ROM will be unlocked.
Start reading 2 times. Please be patient...
flashrom  on Linux 4.19.118-v7+ (armv7l)
flashrom is free software, get the source code at https://flashrom.org

Using clock_gettime for delay loops (clk_id: 1, resolution: 1ns).
Found Macronix flash chip "MX25L6406E/MX25L6408E" (8192 kB, SPI) on linux_spi.
Reading flash... done.
flashrom  on Linux 4.19.118-v7+ (armv7l)
flashrom is free software, get the source code at https://flashrom.org

Using clock_gettime for delay loops (clk_id: 1, resolution: 1ns).
Found Macronix flash chip "MX25L6406E/MX25L6408E" (8192 kB, SPI) on linux_spi.
Reading flash... done.
current image saved as bottom.bak
connection ok
start unlocking ...
Full image detected
The ME/TXE region goes from 0x3000 to 0x500000
Found FPT header at 0x3010
Found 23 partition(s)
Found FTPR header: FTPR partition spans from 0x180000 to 0x24a000
ME/TXE firmware version 8.1.71.3608
Public key match: Intel ME, firmware versions 7.x.x.x, 8.x.x.x
The AltMeDisable bit is NOT SET
Reading partitions list...
 ???? (0x000003c0 - 0x000000400, 0x00000040 total bytes): removed
 FOVD (0x00000400 - 0x000001000, 0x00000c00 total bytes): removed
 MDES (0x00001000 - 0x000002000, 0x00001000 total bytes): removed
 FCRS (0x00002000 - 0x000003000, 0x00001000 total bytes): removed
 EFFS (0x00003000 - 0x0000df000, 0x000dc000 total bytes): removed
 BIAL (NVRAM partition, no data, 0x0000add0 total bytes): nothing to remove
 BIEL (NVRAM partition, no data, 0x00003000 total bytes): nothing to remove
 BIIS (NVRAM partition, no data, 0x00036000 total bytes): nothing to remove
 NVCL (NVRAM partition, no data, 0x00010511 total bytes): nothing to remove
 NVCM (NVRAM partition, no data, 0x0000493f total bytes): nothing to remove
 NVCP (NVRAM partition, no data, 0x0000a553 total bytes): nothing to remove
 NVJC (NVRAM partition, no data, 0x00004000 total bytes): nothing to remove
 NVKR (NVRAM partition, no data, 0x0001257d total bytes): nothing to remove
 NVOS (NVRAM partition, no data, 0x00034af5 total bytes): nothing to remove
 NVSH (NVRAM partition, no data, 0x00007609 total bytes): nothing to remove
 NVTD (NVRAM partition, no data, 0x00001eac total bytes): nothing to remove
 PLDM (NVRAM partition, no data, 0x0000a000 total bytes): nothing to remove
 GLUT (0x000df000 - 0x0000e3000, 0x00004000 total bytes): removed
 LOCL (0x000e3000 - 0x0000e7000, 0x00004000 total bytes): removed
 WCOD (0x000e7000 - 0x000140000, 0x00059000 total bytes): removed
 MDMV (0x00140000 - 0x000180000, 0x00040000 total bytes): removed
 FTPR (0x00180000 - 0x00024a000, 0x000ca000 total bytes): NOT removed
 NFTP (0x0024a000 - 0x0004a4000, 0x0025a000 total bytes): removed
Removing partition entries in FPT...
Removing EFFS presence flag...
Correcting checksum (0x7b)...
Reading FTPR modules list...
 UPDATE           (LZMA   , 0x1cc508 - 0x1cc6c6       ): removed
 ROMP             (Huffman, fragmented data, ~2 KiB   ): NOT removed, essential
 BUP              (Huffman, fragmented data, ~56 KiB  ): NOT removed, essential
 KERNEL           (Huffman, fragmented data, ~135 KiB ): removed
 POLICY           (Huffman, fragmented data, ~91 KiB  ): removed
 HOSTCOMM         (LZMA   , 0x1cc6c6 - 0x1d343f       ): removed
 RSA              (LZMA   , 0x1d343f - 0x1d872a       ): removed
 CLS              (LZMA   , 0x1d872a - 0x1ddec0       ): removed
 TDT              (LZMA   , 0x1ddec0 - 0x1e45be       ): removed
 FTCS             (Huffman, fragmented data, ~18 KiB  ): removed
 ClsPriv          (LZMA   , 0x1e45be - 0x1e499f       ): removed
 SESSMGR          (LZMA   , 0x1e499f - 0x1f32cb       ): removed
The ME minimum size should be 1667072 bytes (0x197000 bytes)
The ME region can be reduced up to:
 00003000:00199fff me
Setting the AltMeDisable bit in PCHSTRP10 to disable Intel ME...
Removing ME/TXE R/W access to the other flash regions...
Checking the FTPR RSA signature... VALID
Done! Good luck!
File /tmp/tmp.ob4vOGD0XY/work.rom is 8388608 bytes
Writing new image to /tmp/tmp.ob4vOGD0XY/work.rom.new
ifdtool and me_cleaner ok
make: Entering directory '/root/skulls-x230-0.1.9/util/ifdtool'
rm -f ifdtool *.o *~ .dependencies
make: Leaving directory '/root/skulls-x230-0.1.9/util/ifdtool'
start writing...
flashrom  on Linux 4.19.118-v7+ (armv7l)
flashrom is free software, get the source code at https://flashrom.org

Using clock_gettime for delay loops (clk_id: 1, resolution: 1ns).
Found Macronix flash chip "MX25L6406E/MX25L6408E" (8192 kB, SPI) on linux_spi.
Reading old flash chip contents... done.
Erasing and writing flash chip... Erase/write done.
Verifying flash... VERIFIED.
DONE
After it completes, we can move on to the top chip. I like to power down the Raspberry Pi before disconnecting/connecting the clip, so I will do that now by issuing a shutdown -h now. I don’t know if this is necessary, but feels safer than potentially applying power to the wrong pins of the chip if I connect the clip incorrectly.
With the top chip connected, we can switch the Raspberry Pi on and get back into our Skulls working directory. Here, there is a choice between which firmware image you want to flash, as one includes the proprietary VGA BIOS and the other is completely free software. There are pros and cons for each choice so I recommend you do your research here before selecting which image is right for you, https://github.com/merge/skulls/blob/master/x230/README.md#release-images-to-choose-from. I decided to use the image with proprietary code.
Now it’s time to flash the top chip, again also creating a backup:
# cd skulls-x230-*
# ls *top.rom
x230_coreboot_seabios_free_24e6221706_top.rom
x230_coreboot_seabios_24e6221706_top.rom
# ./external_install_top.sh -k top.bak
1) ./x230_coreboot_seabios_free_4bd6927388_top.rom
2) ./x230_coreboot_seabios_4bd6927388_top.rom
3) Quit
Please select a file to flash or start with the -i option to use a different one: 2
Please select the hardware you use:
1) Raspberry Pi
2) CH341A
3) Quit
Please select the hardware flasher: 1
trying to detect the chip...
Detected MX25L3206E/MX25L3208E.
verifying SPI connection by reading 2 times. please wait.
flashrom  on Linux 4.19.118-v7+ (armv7l)
flashrom is free software, get the source code at https://flashrom.org

Using clock_gettime for delay loops (clk_id: 1, resolution: 1ns).
Found Macronix flash chip "MX25L3206E/MX25L3208E" (4096 kB, SPI) on linux_spi.
Reading flash... done.
flashrom  on Linux 4.19.118-v7+ (armv7l)
flashrom is free software, get the source code at https://flashrom.org

Using clock_gettime for delay loops (clk_id: 1, resolution: 1ns).
Found Macronix flash chip "MX25L3206E/MX25L3208E" (4096 kB, SPI) on linux_spi.
Reading flash... done.
current image saved as top.bak
connection ok. flashing x230_coreboot_seabios_4bd6927388_top.rom
flashrom  on Linux 4.19.118-v7+ (armv7l)
flashrom is free software, get the source code at https://flashrom.org

Using clock_gettime for delay loops (clk_id: 1, resolution: 1ns).
Found Macronix flash chip "MX25L3206E/MX25L3208E" (4096 kB, SPI) on linux_spi.
Reading old flash chip contents... done.
Erasing and writing flash chip... Erase/write done.
Verifying flash... VERIFIED.
DONE

Flashing in progress!
That’s it, you are now all flashed! You can reassemble your X230 and boot it up to make sure it all work. If you used the image with proprietary VGA BIOS, you will also get a new splash screen.
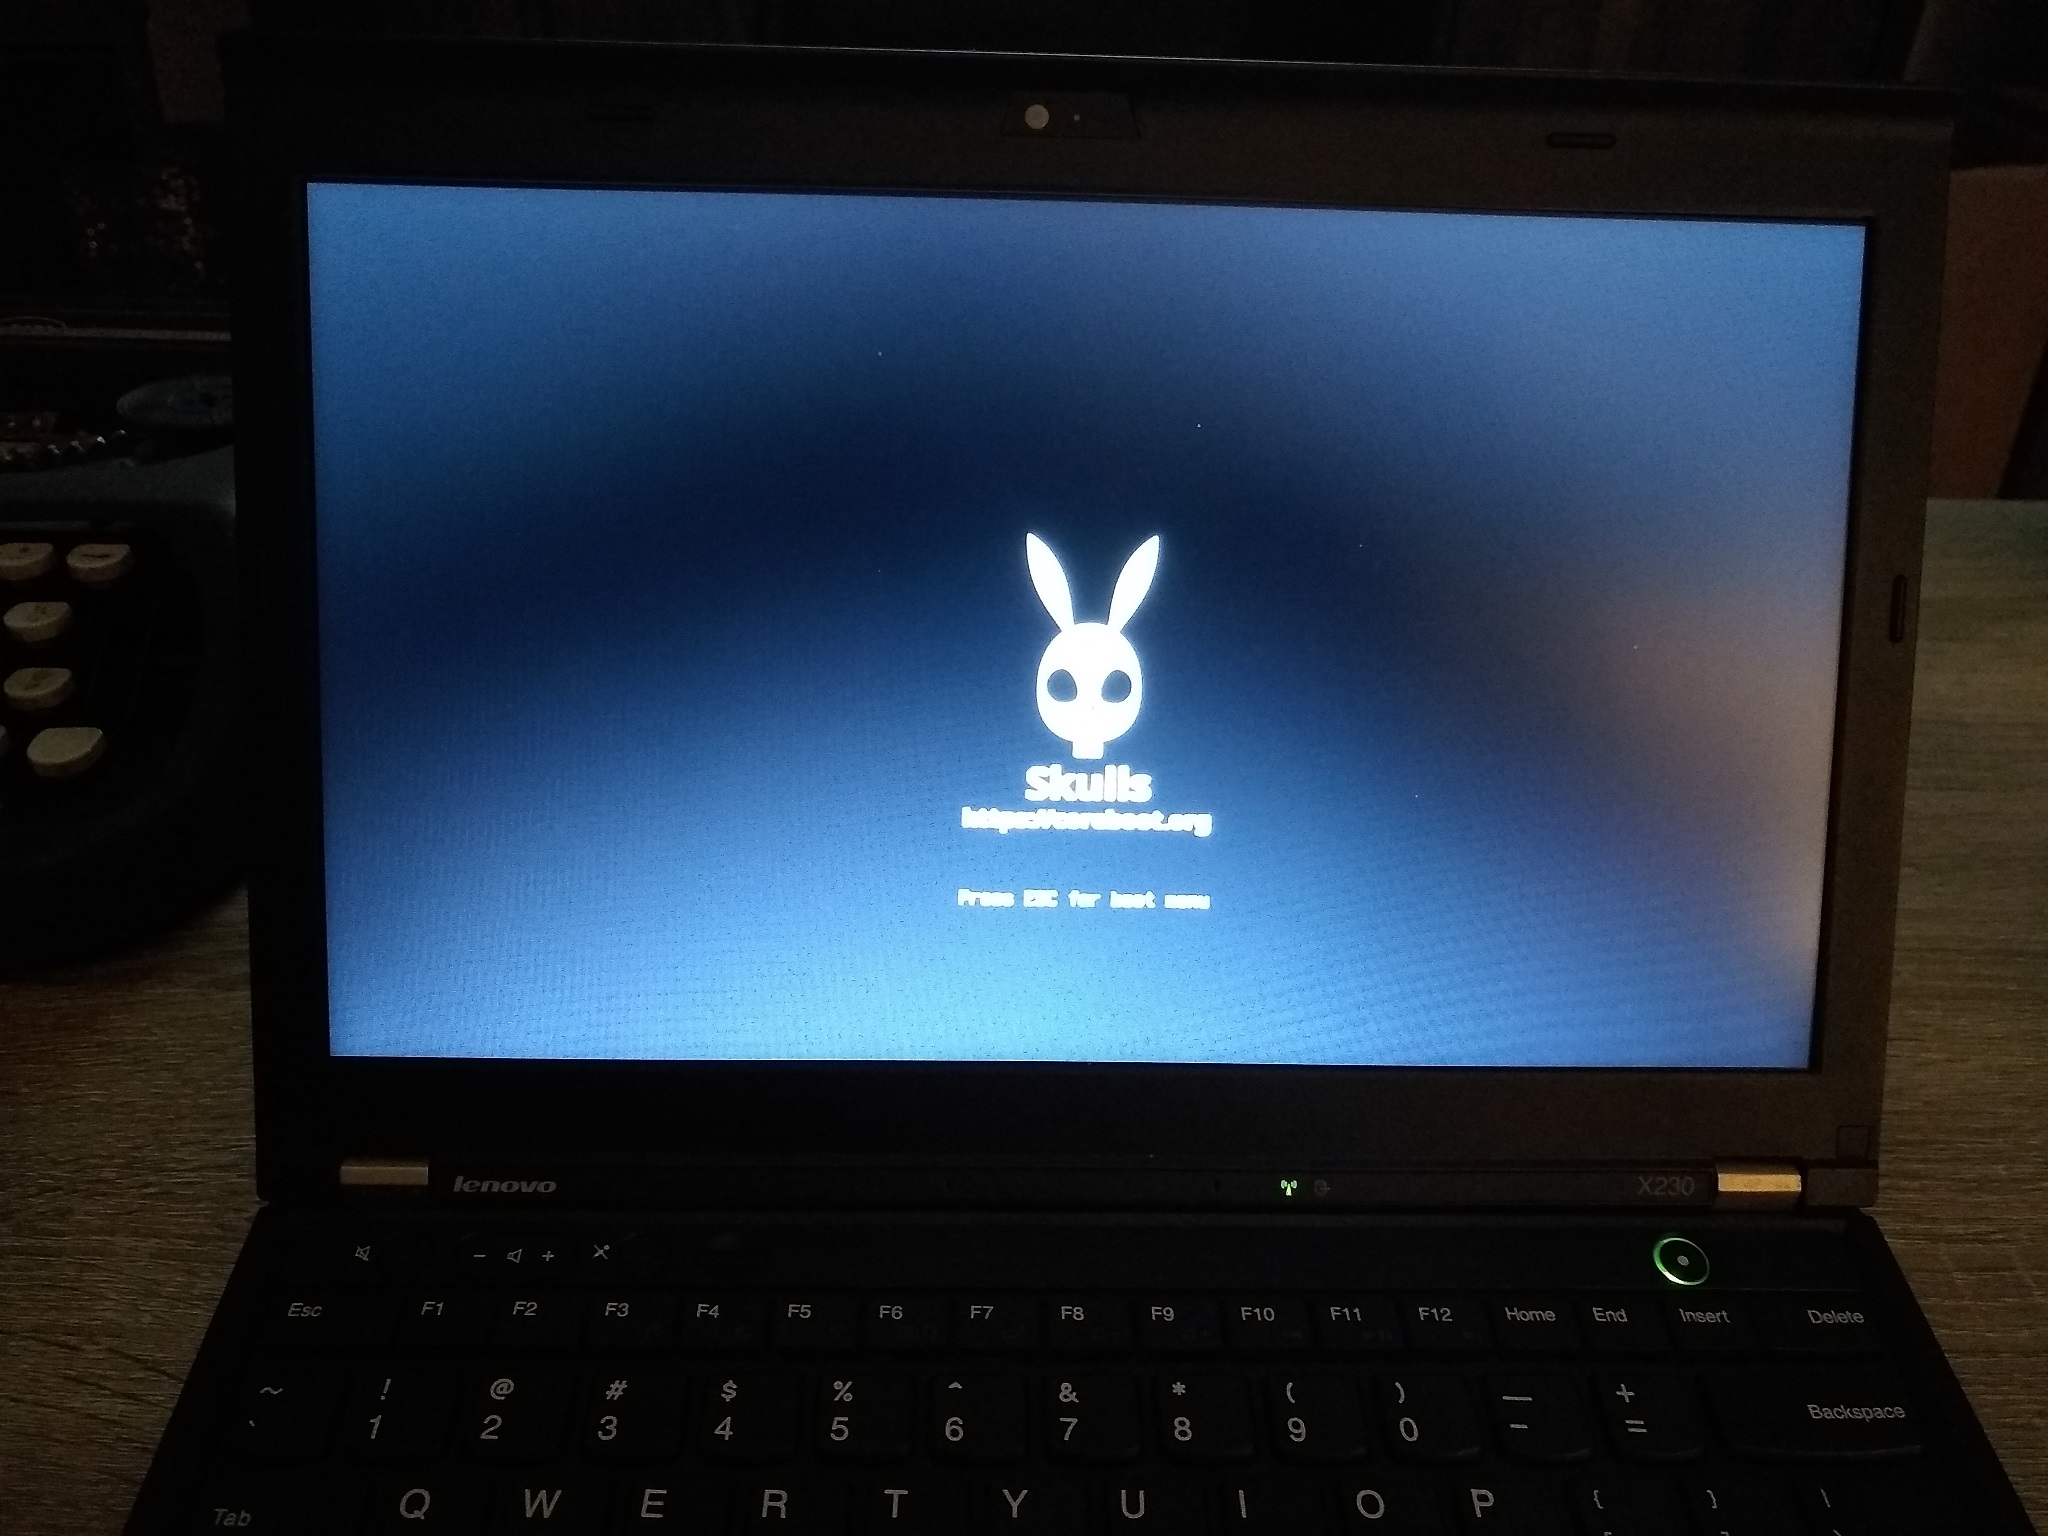
Skulls is installed!
Conclusion
Now that coreboot is installed, you have a more free system that not only increases your security and privacy, but also does some nifty things like remove the WiFi card whitelist so you can use a more modern and capable wireless card for increased performance.
In the future, I will take a look at small upgrades and modifications I can continue to do to the X230.
In the meantime, make sure you keep your chip backup files in a safe place!