Installing FreeBSD 12 on the Atomic Pi
By the end of April, Digital Loggers released the Atomic Pi, an x86-64-based single board computer, for sale on their website. Many speculate that these boards were bought wholesale from another company’s liquidation, and their strange assortment of navigation and audio features may indicate that they were originally built for automotive use. That said, they boast decent specifications for the inexpensive ($35) price especially compared to other x86/x86-64 boards like the Jaguarboard and UDOO:
- SoC – Intel Atom x5-Z8350 quad core processor @ up to 1.92GHz with Intel HD graphics
- System Memory – 2GB DDR3L-1600
- Storage – 16GB eMMC flash, slot for SD expansion up to 256GB
- Video Output – HDMI port
- Connectivity
    - Gigabit Ethernet via Realtek RTL8111G transceiver
    - Dual band 802.11b/g/n/ac WiFi 5 via RT5572 with IPX connectors on board
    - Bluetooth 4.0 via CSR8510
- USB – USB 3.0 and USB 2.0 ports
- Sensor – 9-axis inertial navigation sensor with compass (BNO055)
- Expansion – JST style connectors and a 26-pin header for power & GPIO
- Debugging – TTL serial debug and expansion serial ports up to 3.6Mbps
- Misc – Real time clock & battery
- Power Supply – 5V/4A recommended. 4-15 watts typ. power consumption
- Dimensions – 130 x 100 x 50 mm
(Specs via https://www.cnx-software.com/2018/12/22/atomic-pi-low-cost-intel-atom-x5-board/)
I’ve been eyeing a board like this for some time in order to run a BBS on low-cost, small-footprint hardware without having to emulate x86 architecture on top of ARM via some other SoC. That said, gigabit ethernet and onboard wireless (with an antenna connector, even!) could make this board viable for homebrew mesh-networking applications in the future.
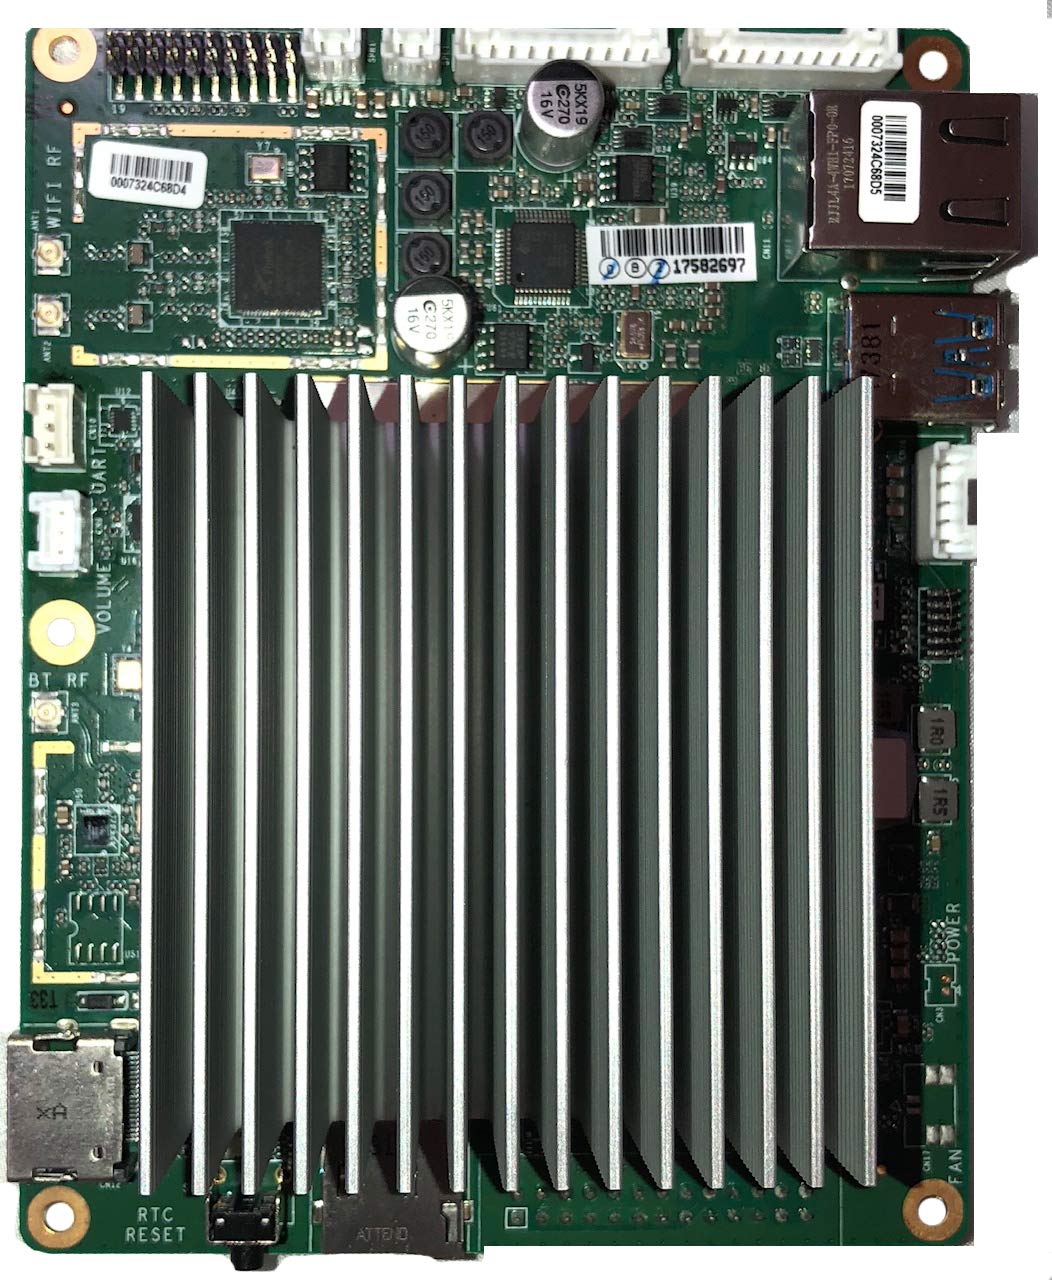
Atomic Pi overview.
Getting Started
Upon receiving the board, the first hurdle you must face is powering it. The board itself has no power jack, whether it be a barrel plug or micro USB female. Some bundles include a breakout board that supports a barrel-type connector, which can also be purchased separately from resellers. However, with one of those you will also need a DC adapter with a 5.5mm/2.1mm plug that can pump out ~3 amps.
I happened to already have a 5-volt power supply (similar to this one) that went unused for a past project, so I chopped up a PC power cord to feed it AC. I then cut two dupont jumper wires in half (down the middle), stripped away some insulation, and screwed two halves into each of the two 5-volt pos/neg terminals on the supply (cut side on the terminals). To connect the power supply to the board, the two positive wires can be plugged into any two of pins 3, 5, 7, 9, 11 or 13 for +5 while the two negative wires can be plugged into any two of the pins 2,4,6,8,10,12 or 14 for GND.

At this point the board should power up and boot into its default operating system, which should help you determine if the hardware is performing properly. However, we want to install something different.
Installing FreeBSD
So first, we need to prepare some installation media. I had bad luck booting FreeBSD from an external DVD drive, so I recommend preparing either a microSD card or a flash drive. Due to the Atomic Pi only having one USB port, you will need to use a USB hub if you decide to use a flash drive so you can connect the drive along with a keyboard.
Insert your drive/card into a separate machine and download the FreeBSD-12.0-RELEASE-amd64-memstick.img image file from here. Then, write the image to your device following the instructions under section 2.3.1.1. Writing an Image File to USB in the guide here.
Now, insert your device into the Atomic Pi and power-cycle it. While it is restarting, repeatedly press the Esc key to boot the machine into the UEFI. Then, cycle through to the Boot tab and change the boot order, putting your device before the eMMC.
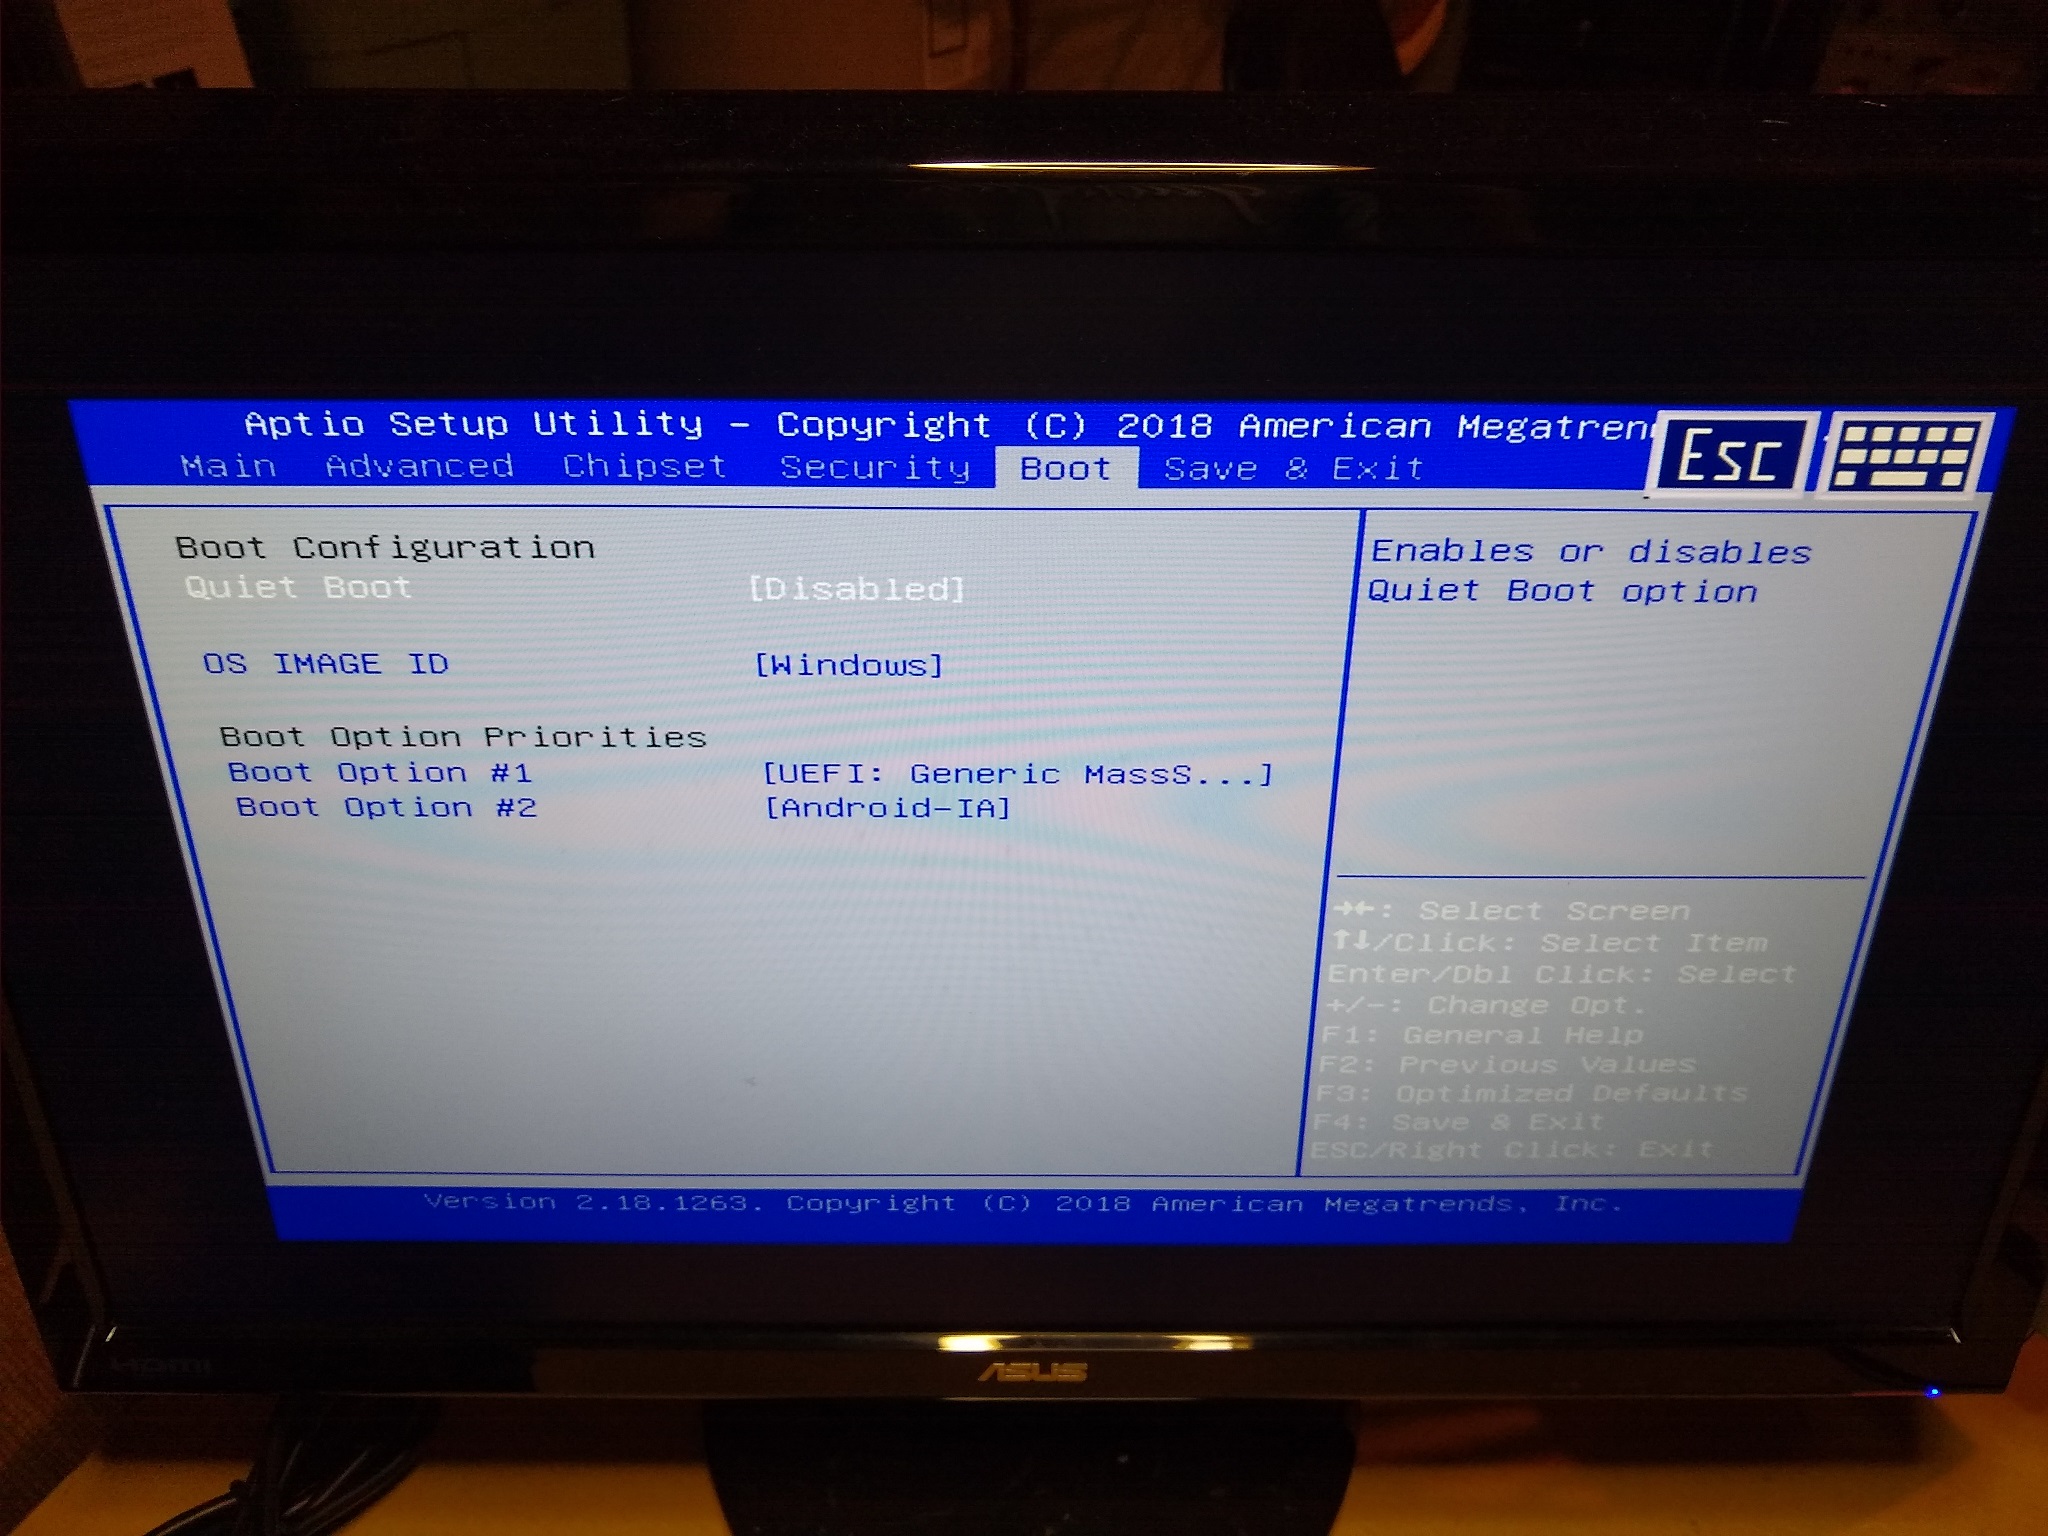
Make sure your device is first, while Android-IA (the eMMC) is second.
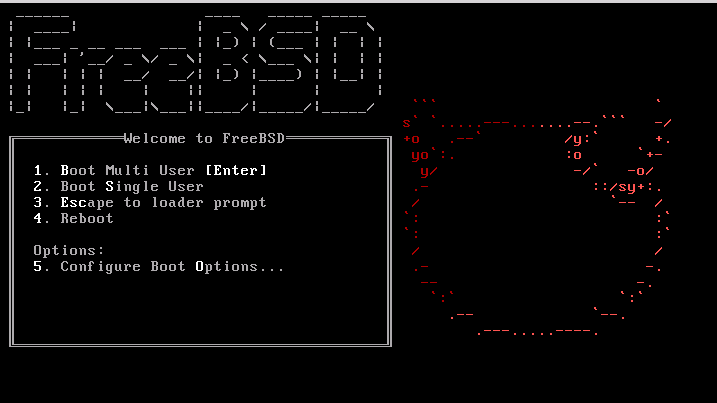
Then, press F4 to save and exit, which will restart the system again. This time, the FreeBSD installer should boot up. On the initial installer screen selection option 3. Escape to loader prompt.
You will now have a limited terminal to configure some configuration options. Enter the following to disable UART (otherwise the install will freeze) and then start bsdinstall (thanks to u/ArchiKola via Reddit for this):
set hint.uart.0.disabled="1"
set hint.uart.1.disabled="1"
boot
Now, you can go about the install process as normal.
Once finished, elect for the option to boot into the live environment to perform configuration before rebooting system. We need to apply those same UART changes or the new installation won’t boot properly. To do this, edit the loader configuration:
# vi /boot/loader.conf
Then, add the following two lines to the bottom of the file:
hint.uart.0.disabled="1"
hint.usart.1.disabled="1"
Everything’s done! We can now remove the installation media and reboot:
reboot
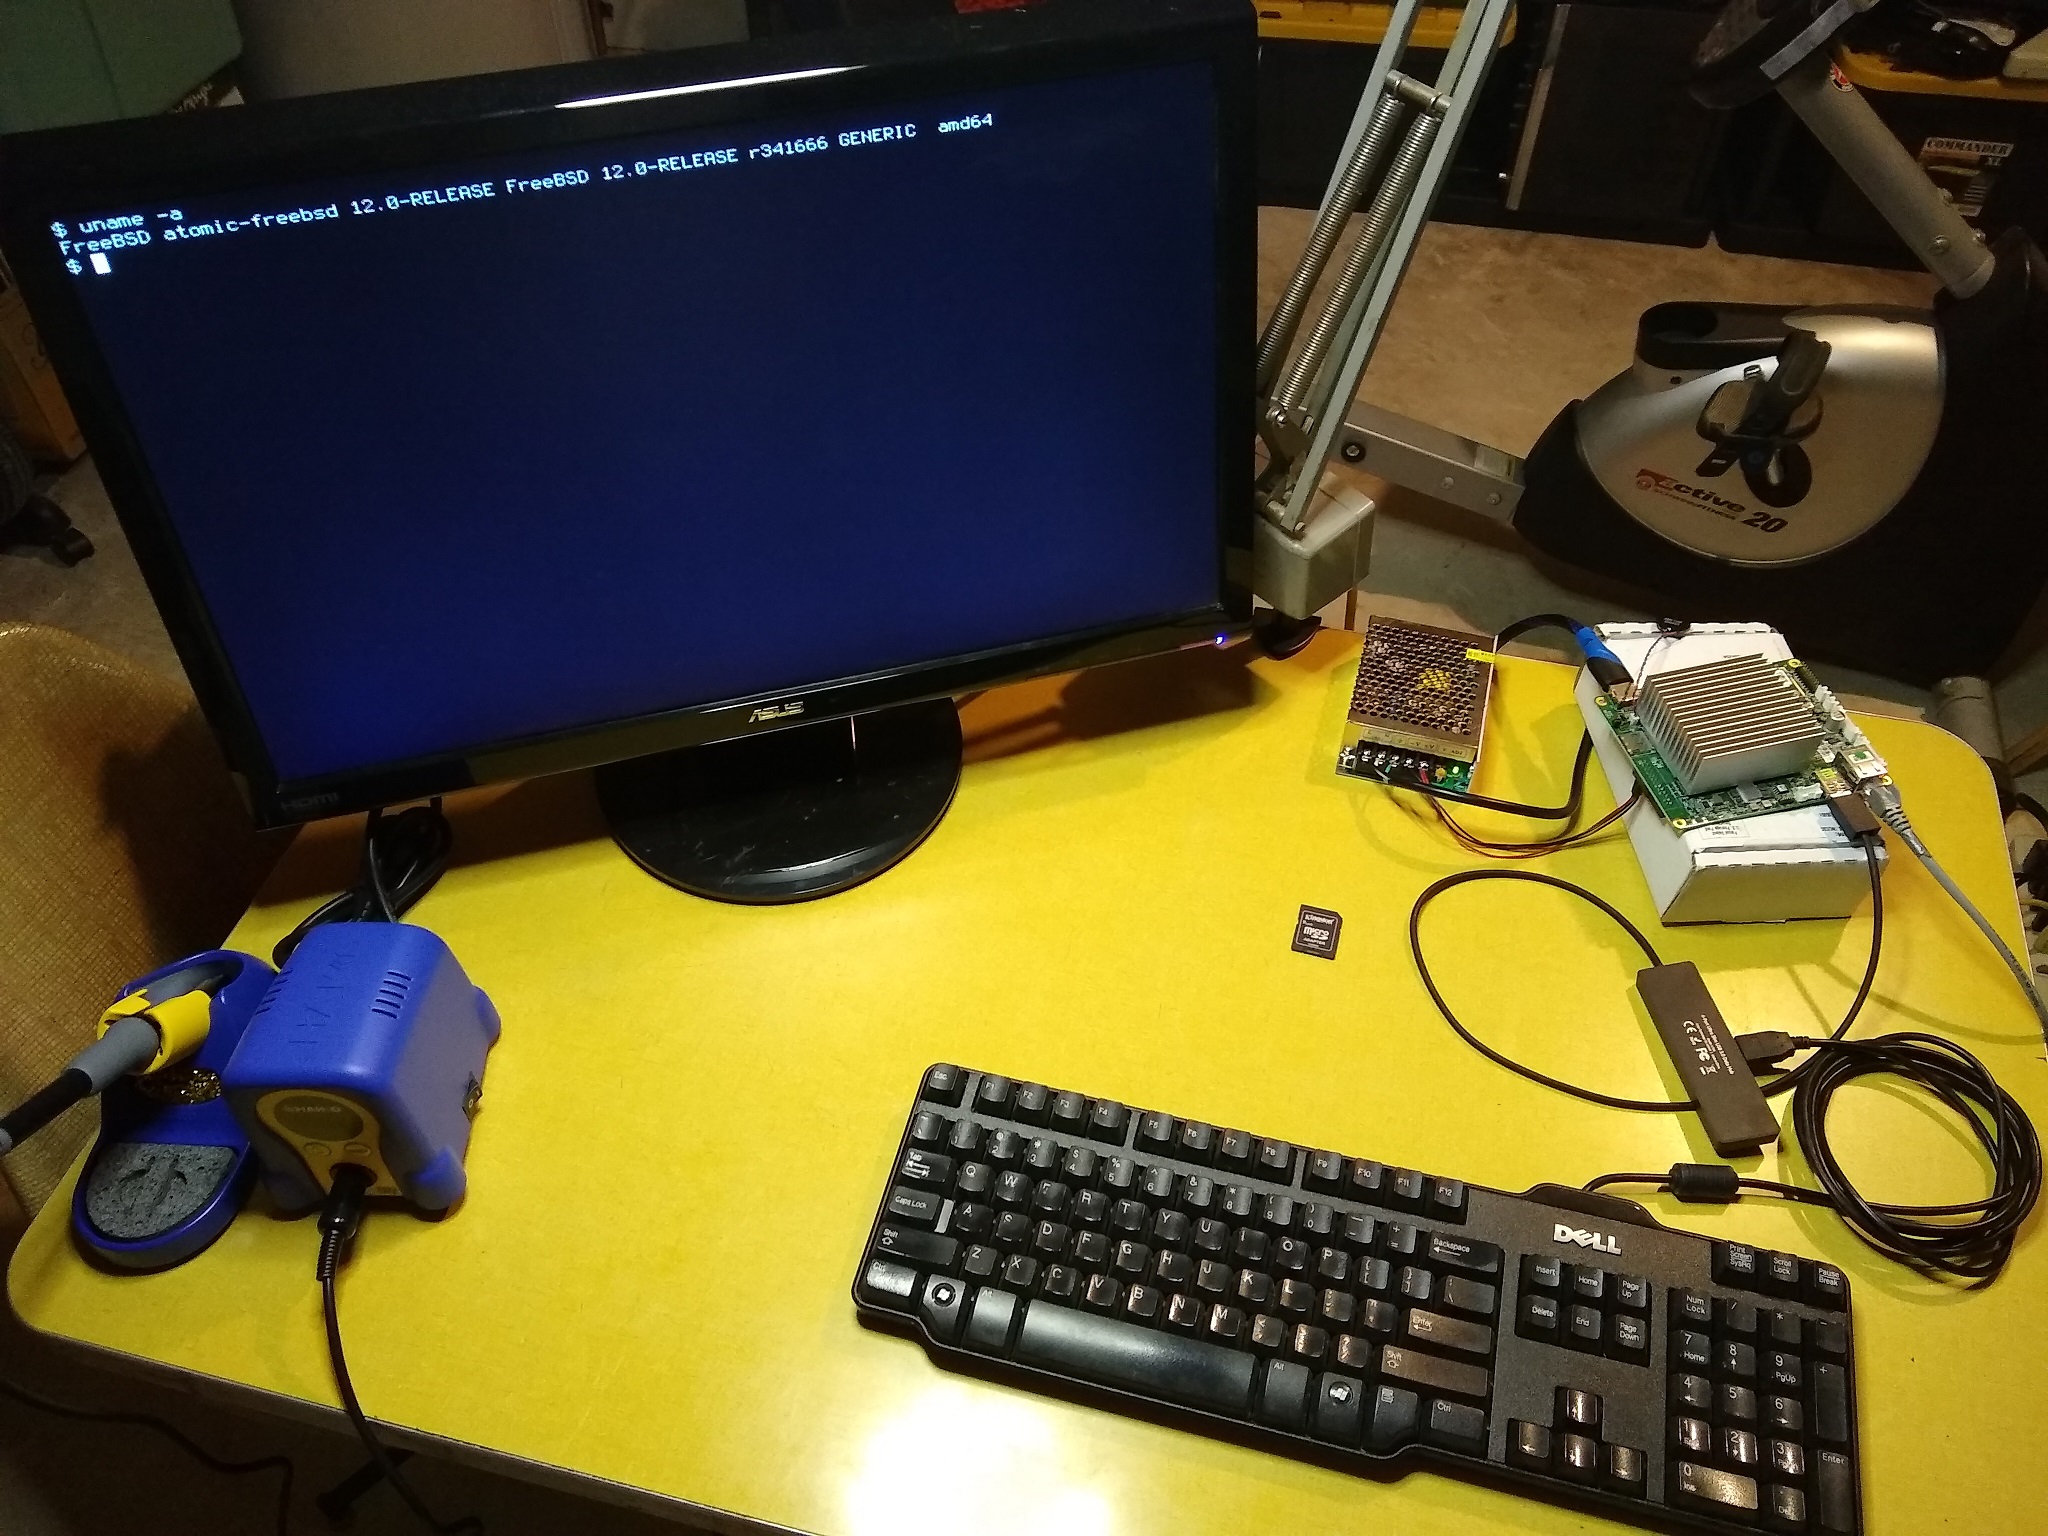
FreeBSD 12.0!
Happy hacking!